Blog
Blog
We love the Brother ScanNCut machines here at CB HQ! They provide us with endless possibilities for our crafty projects and allow us to expand our imaginations and create makes that we could only dream of before! From fabric to paper, there’s so much that this nifty gadget can do. It has truly revolutionised the art of papercutting. There’s no more painstaking work with a scalpel and cutting mat - now you can draw out intricate designs, then scan and cut it within minutes. Plus, you can cut out hundreds more, all exactly the same!
To celebrate this exceptional machine, we’ve rounded up our favourite projects. Take a look and be inspired…
1 Gift Bags
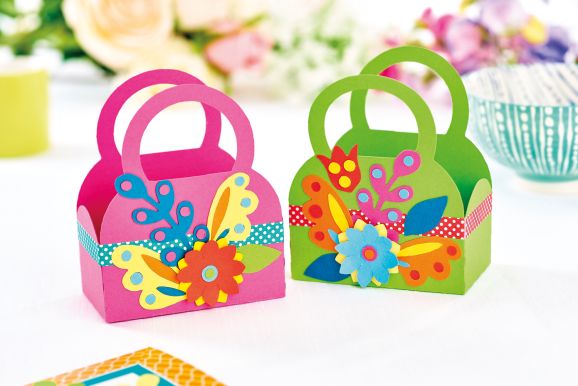
1 Using the templates, score the basket shape along the dashed lines. Trim away the round tab in the middle of the handle, then fold up the basket and secure the tabs to the insides with PVA. Wrap a length of washi tape around the middle of the basket.
2 Select several leaf and flower motifs in various colours. Arrange on the front of the basket in a symmetrical pattern, then stick the design in place.
2 Teacup Card
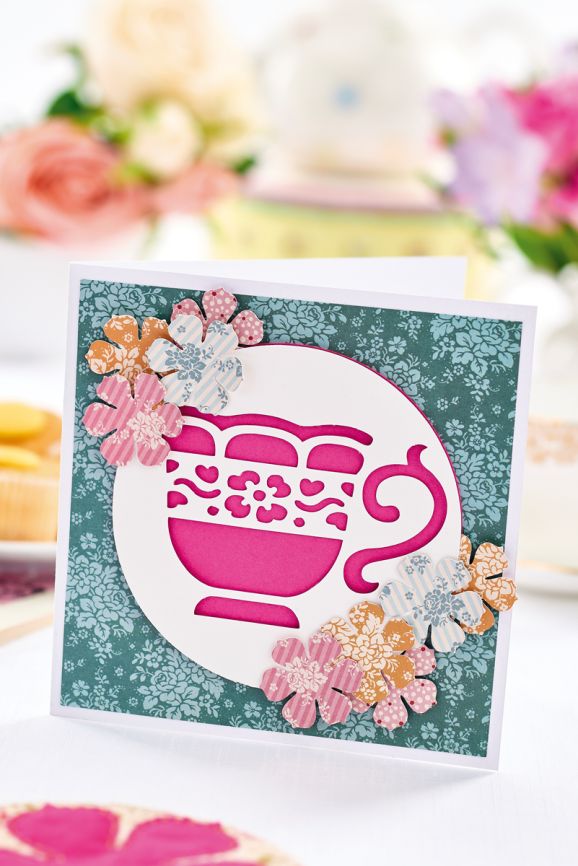
1 Select the teacup stencil design (ST-B005) and resize to 6.8cm in height. Position in the centre of the layout grid and add an 11cm diameter circle (BA-A045) around it so the cup sits centrally. Trim the design from white card and a second circle from card. Layer the two discs together using foam pads. Matt patterned paper, 14cm square, to the centre of a blank, 15cm square. Fix the layered discs to the centre.
2 Select the flower pattern (AR-A033) and resize to 3.5cm. Cut several flowers from three different patterned papers. Curl the petals of each flower up slightly using your thumbnail and scatter around the teacup design.
3 Birthday Card
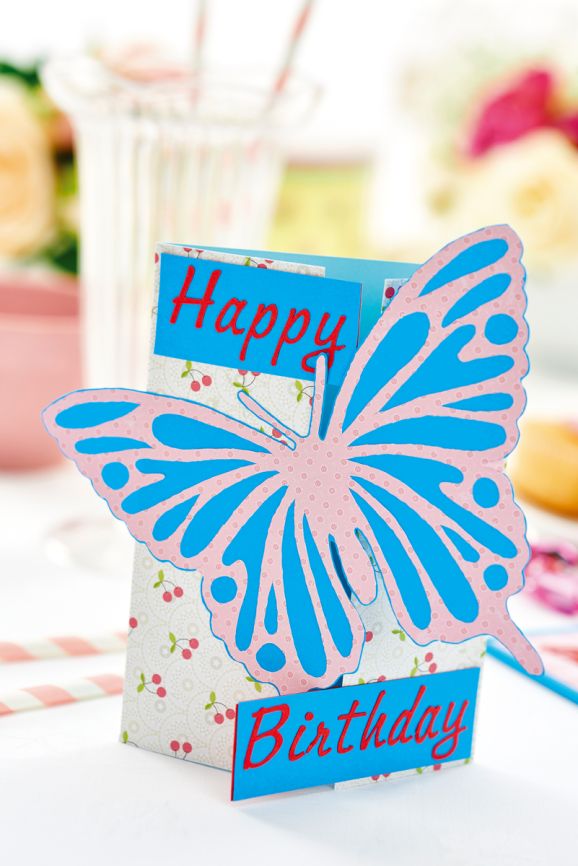
1 Create a light blue A5 gatefold card and cover the outside with pale patterned paper. Select both the outlined and detailed butterfly motifs on the pattern pages and enlarge to 15.5cm wide.
2 Cut the outline from blue cardstock and the detailed shape from pale pink paper. Layer together and glue half the butterfly to the left side of the gatefold.
3 Select typeface FO-A007 and type out ‘Happy Birthday’. Resize to 18mm tall and cut from bright red card. Use a fine tip applicator to stick the letters to blue and cut each word into a 3cm high panel.
4 Fix the panels to the top-left and bottom-right of the gatefold so they extend over the open edges of the card. When displayed, the overhanging areas will extend at different angles.
4 Hanging Wreath
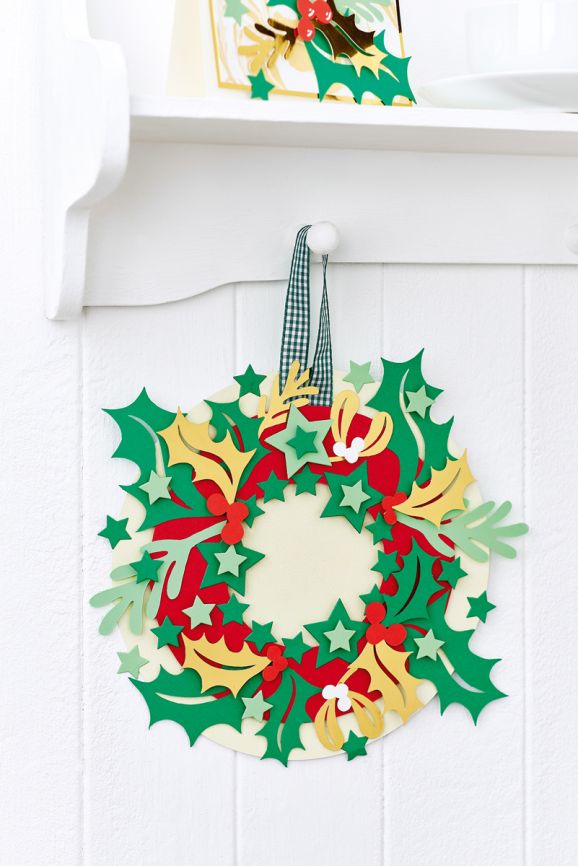
1 Size circle BA-A045 to 22cm wide and cut from cream glitter card. Resize to 17.5cm, add a second 9.5cm circle to the centre and cut a ring from red card. Fix a loop of green gingham ribbon to the back of the ring before sticking to the middle of the glitter circle with foam pads.
2 Choose star motif BA-A074 and set at 2cm and 4cm wide. Cut several stars from two colours of green card in both sizes. Arrange a ring of stars around the inside of the red ring, layering smaller ones on large stars with foam pads.
3 Take some of the larger pre-cut leaf motifs and glue at regular intervals around the ring. Fill in the gaps with smaller motifs before adding more above the large with foam pads. Add white mistletoe and red holly berries to the motifs, and fill any bare areas with small star shapes.
5 Feather Frame
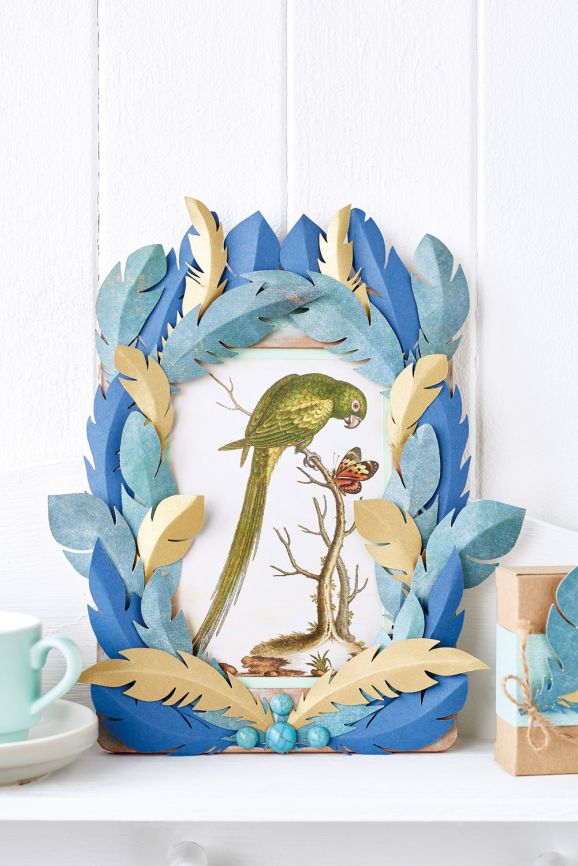
1 Decoupage a wooden frame with pale green paper and, once dry, distress the edges with gilding wax. Fit a picture or art print inside, adding a mount if necessary. Cut several pairs of feathers from coloured papers. Crease each one down the centre, using a ball-ended tool to score a curved line first.
2 Arrange the feathers in a symmetrical pattern around the frame so as not to obscure the print, then fix in place using PVA on the quills. Cover the quills at the base of the frame with gems.
6 Tote Bag

1 Use a cotton tote or make your own from two panels of 6cm wide fabric strips joined together in a log cabin design with a square of denim in the centre. Line the panels, then sew to make a bag and add handles.
2 Press the bag well and, while it is warm, lay the butterfly rhinestone design onto the fabric at an angle. Iron in place, allow to cool and peel away the transfer sheet to reveal the sparkling motif.
7 Unicorn Mobile
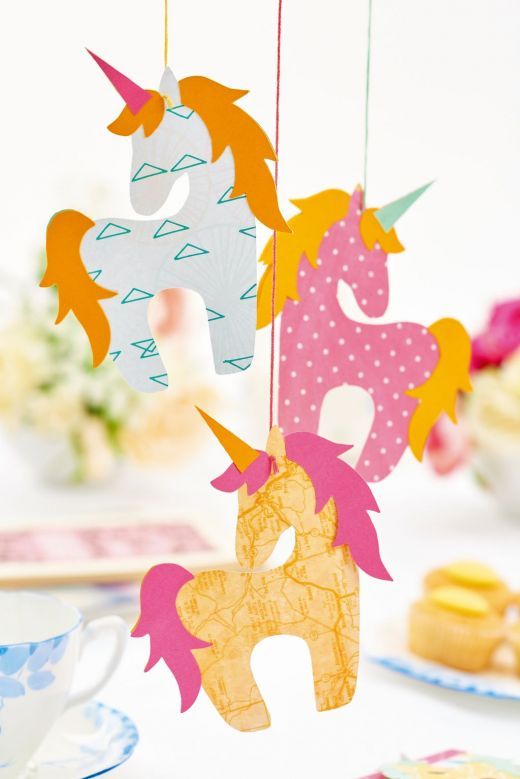
Enlarge the unicorn body pieces by 25% and cut out from double-sided and plain card. Create twice as many features as bodies. Layer the pieces together, adding features on both sides. Pierce a small hole below each ear and thread a length of embroidery thread through for hanging.
8 Flower Garland
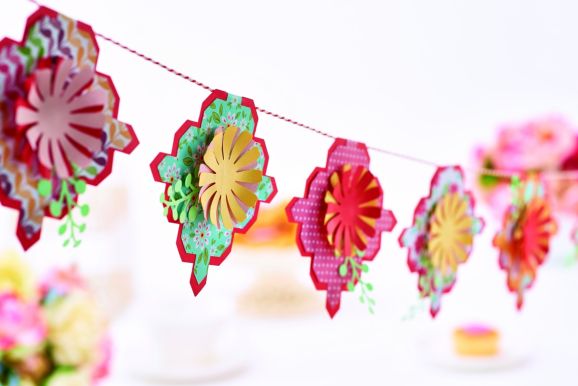
1 Using the ScanNCut’s library of designs, cut several BA-A173 shapes from red card at 9.5cm. Reduce the same design to 8.5cm, then cut the shape from different patterned papers.
2 Mount a patterned shape to the centre of each red one. Bend over the top point of each panel, then secure over a length of bakers twine to create a garland of diamond shaped flags.
3 Select flower shape AR-A031 and size to 6cm across. Cut multiple images from thin red, pink, and yellow cardstock. Curl the petals around a scissor blade and layer together using foam pads.
4 Select leaf spray AR-A034, rotate it on the display so it’s upright, then resize to 6.5cm tall. Choose multiple motifs arranging them in neat, evenly spaced lines across the cutting area.
5 Cut from pale green cardstock, removing the background from one to use later. Fix a leaf and flower to each diamond flag, changing the angle of the leaves each time. Attach to a length of twine and hang.
9 Christmas Trees
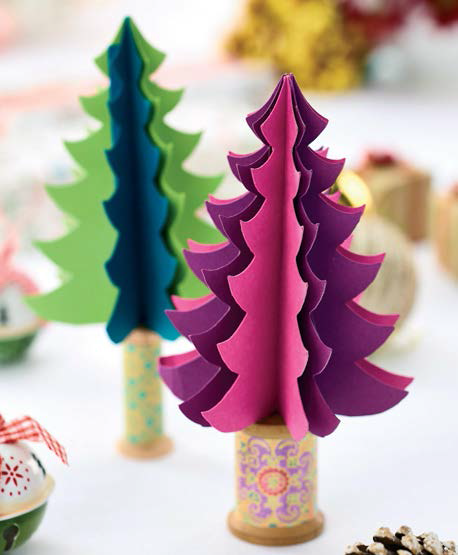
1 Cover an A6 blank with patterned paper. Cut three full-size tree images from coloured card. Score and fold each one down the centre. Secure the trees in the centre using foam pads, moving each layer down by 7mm.
2 Weave embroidery thread through two heart-shaped buttons and knot at the back. Secure the buttons to the top and bottom of the tree motif.
Blogs you may also like...
- SHARE
-

-

-
 hello
hello
-




_151_86_int_c1.png)


