


Fold a set of colourful blooms to brighten your home
What you need...
- 15cm double-sided origami paper
Tiny terracotta flowerpots
Ruler
Craft knife
Scissors
Narrow double-sided tape
instructions
-
Cactus Leaf - 1. This leaf is for the pink flowers. Fold a green square diagonally and open out. Turn the paper so that the diagonal crease is running vertically. Fold the left and right corners in towards the centre crease, lining the outer edges along the centre crease to make an arrow shape.
2. Turn the piece around and fold the other outer edges in towards the centre crease, forming a shallower arrowhead shape. Still working on this point, fold the edges in once more on both sides. Turn the piece over and fold the piece in half, matching the two points together. Next, fold the whole piece in half lengthways along the first diagonal crease line.
3. Pull the narrower point out away from the larger and re-crease the base. Bend and curl the larger leaf shape out and away from the narrower point that will become the stem of the plant. -
Flower - 1. Pink flowers: divide and cut a 15cm piece of pink paper into four equal smaller squares. Fold one of the smaller squares diagonally and then cut the piece in two along this fold line. Working on the long diagonal edge fold over 5mm across the length of the edge, turn the piece over and fold another 5mm. Carry on folding and turning, creating a concertina effect across the piece.
2. Fold the piece in half, matching the two pointed ends together. Stick a small piece of double-sided tape along the edge of the first fold to hold the sides together. Open out the fold slightly to create a leaf-shaped flower. Using a small piece of double-sided tape, stick the flower to the tip of a cactus stem.
3. Red flower: take a 15cm square of red paper, cut diagonally and fold in the same way as the pink flowers, working from the cut edge. -
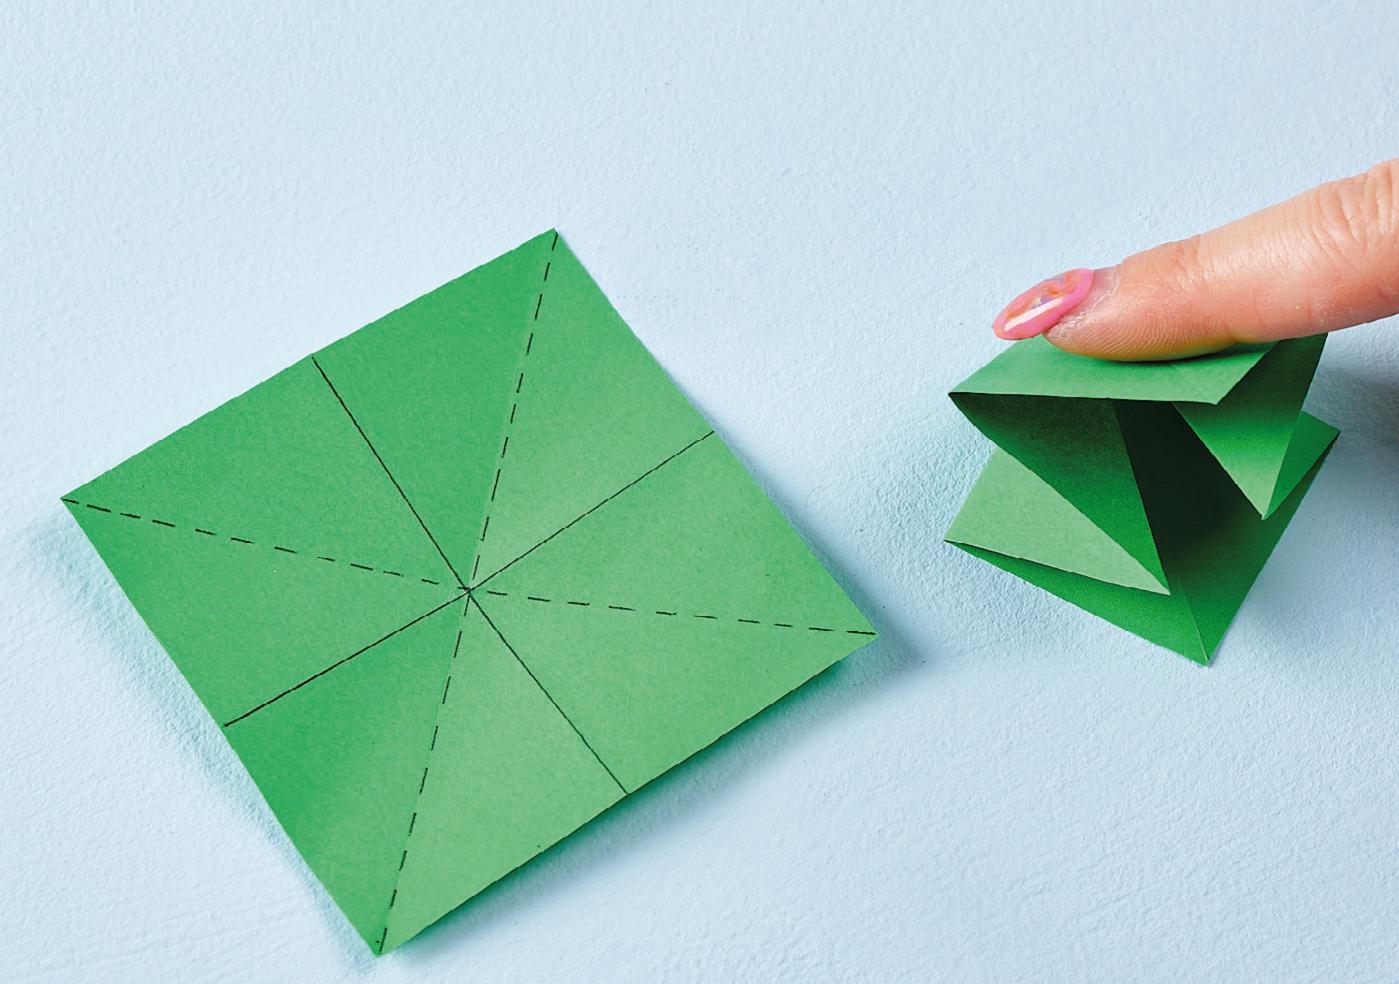
Three Leaf Sprig - 1. This leaf is for the red and yellow flowers. (For the red flower use a whole piece of 15cm square paper, for the yellow flowers, divide and cut a 15cm sheet of origami paper into four equal smaller squares). Fold the square diagonally one way and open out, then fold the opposite way across the paper, again opening out the square. Turn the square over, fold it in half one way, then the opposite way and open out the folds. Holding the half folds, push in and create a layered smaller square a quarter of the size of the original [1].
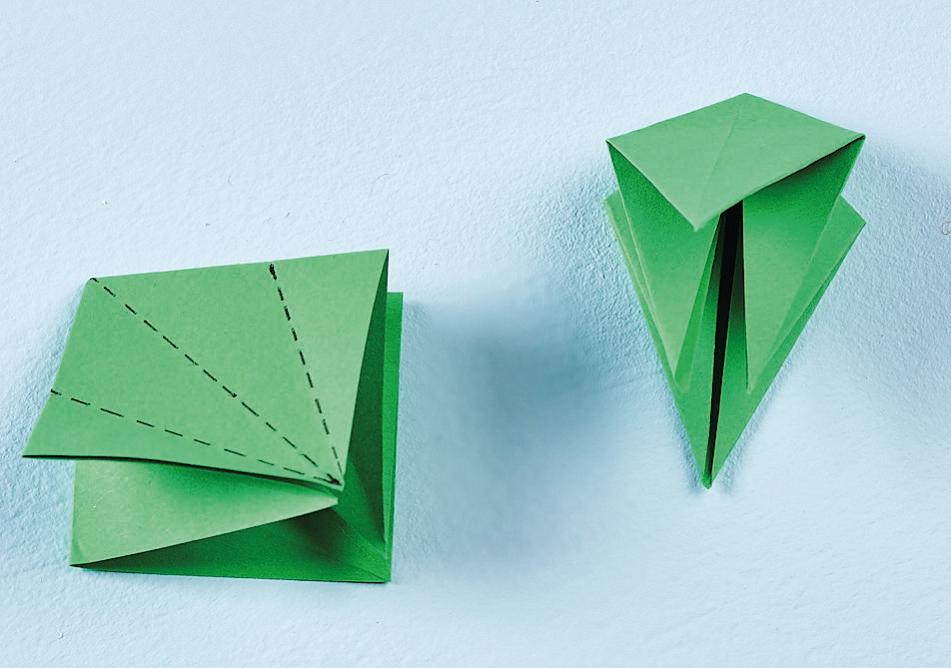
2. Turn the square so that the point of the open edges is pointing at you. Fold the adjacent left corner toward the centre crease line, aligning the outer edges with the centre crease, then repeat on the opposite right side. Unfold, turn the piece over and repeat on the reverse side. Lift the open corner like a mouth, fold in the previous unfolded crease lines in toward each other, then flatten the folds down and repeat on the other side creating a kite shape [2].
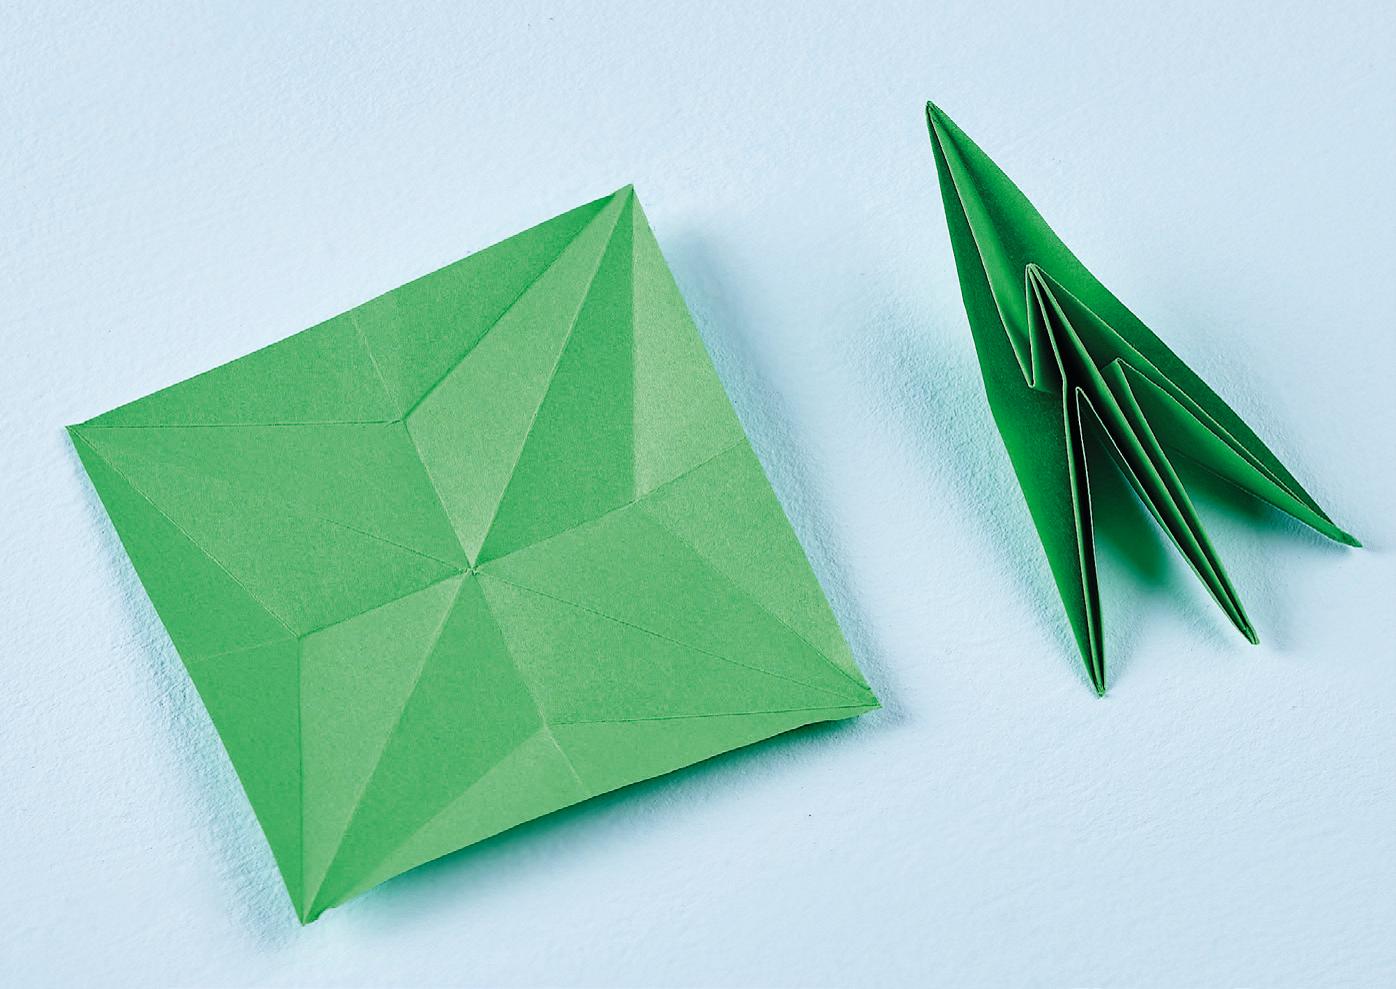
3. Open out all the folds, then gently press down in the centre so that the folds reverse in on themselves. With both hands push along the original half fold creases, then push in holding three of the points together and drawing the rest in the opposite direction. This single point becomes the stem of the leaves [3].
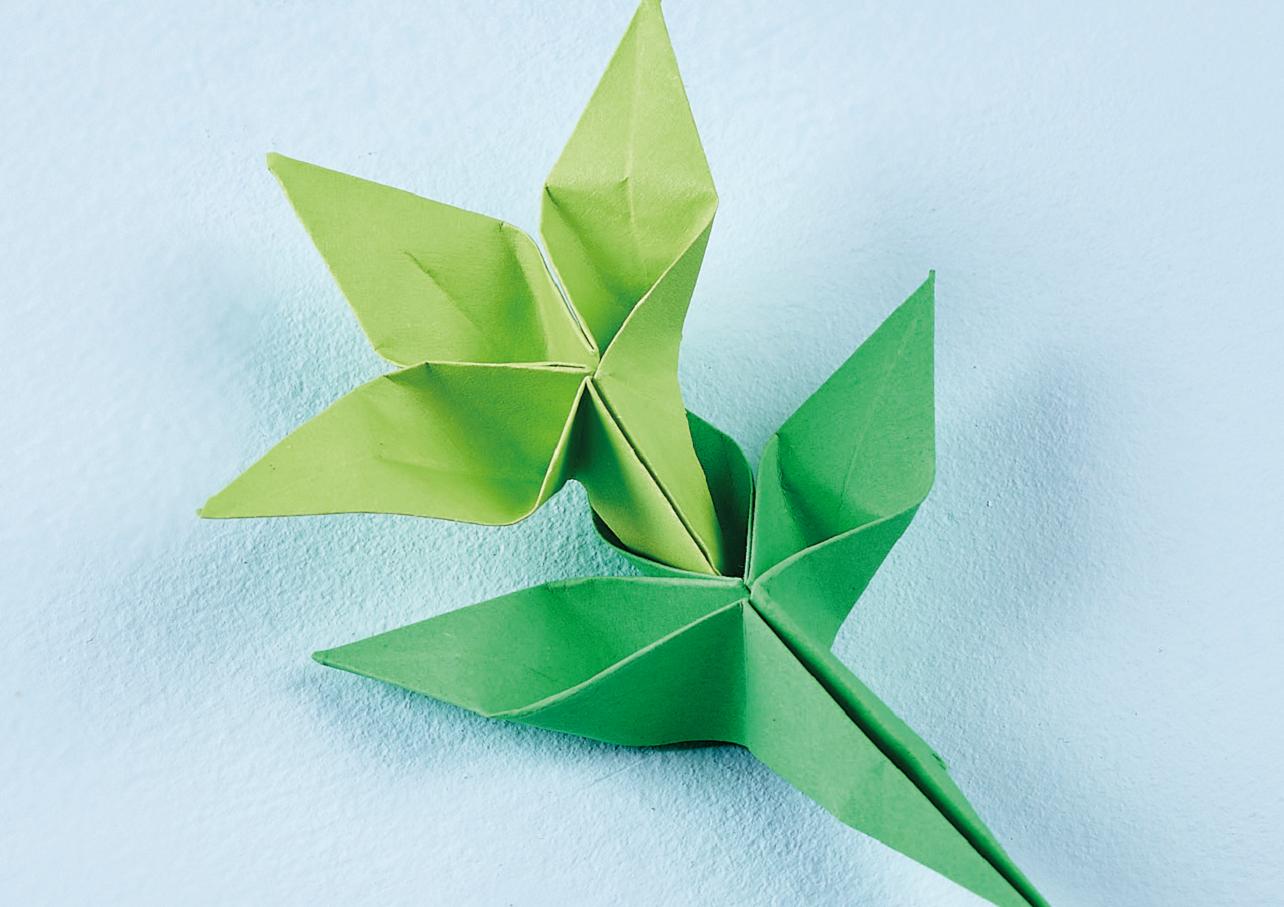
4. Push your finger into each of the remaining three points and bend backwards to create three leaf shapes. Repeat the process three or four times, then insert the stem of one piece into the centre leaf of another. Repeat to create a series of leaves one on top of the other [4].
-
Yellow Flower - 1. Divide and cut a 15cm piece of yellow paper into four equal smaller squares. Fold one of the little squares in half one way and open out, then fold the opposite way and open out again. Next, fold each corner to the centre, turn the piece over to the reverse side, then repeat the process. Stick a small piece of double-sided tape in the centre of the folds.
2. Turn the piece over, lift the four outer corners, then place your thumb and index finger on both hands inside each lifted corner. Pinch together, drawing the four lifted squares in to meet each other in the centre.
3. On the reverse side a point will have been formed. Pinch the four edges of this point together; they should be held in place by the double-sided tape inside. Turn the piece over and using either your fingers or the blunt edge of a pair of small scissors, slightly curl the lifted corners to form petals. The flower can be turned over and placed onto a centre leaf of a stem of leaves. Place the completed plant inside a small terracotta flowerpot.


Projects you may also like...


Recommended Projects...
 Crafts Beautiful Edition


