
Project
SNEAK PEEK! 3D Window Card Kit
- Designer: Colette Smith
- Tags:
- free gift, crafts, christmas, cardmaking, card making,


Layer, decoupage and embellish your way to impressive festive greetings with the November 18 free gift
instructions
-
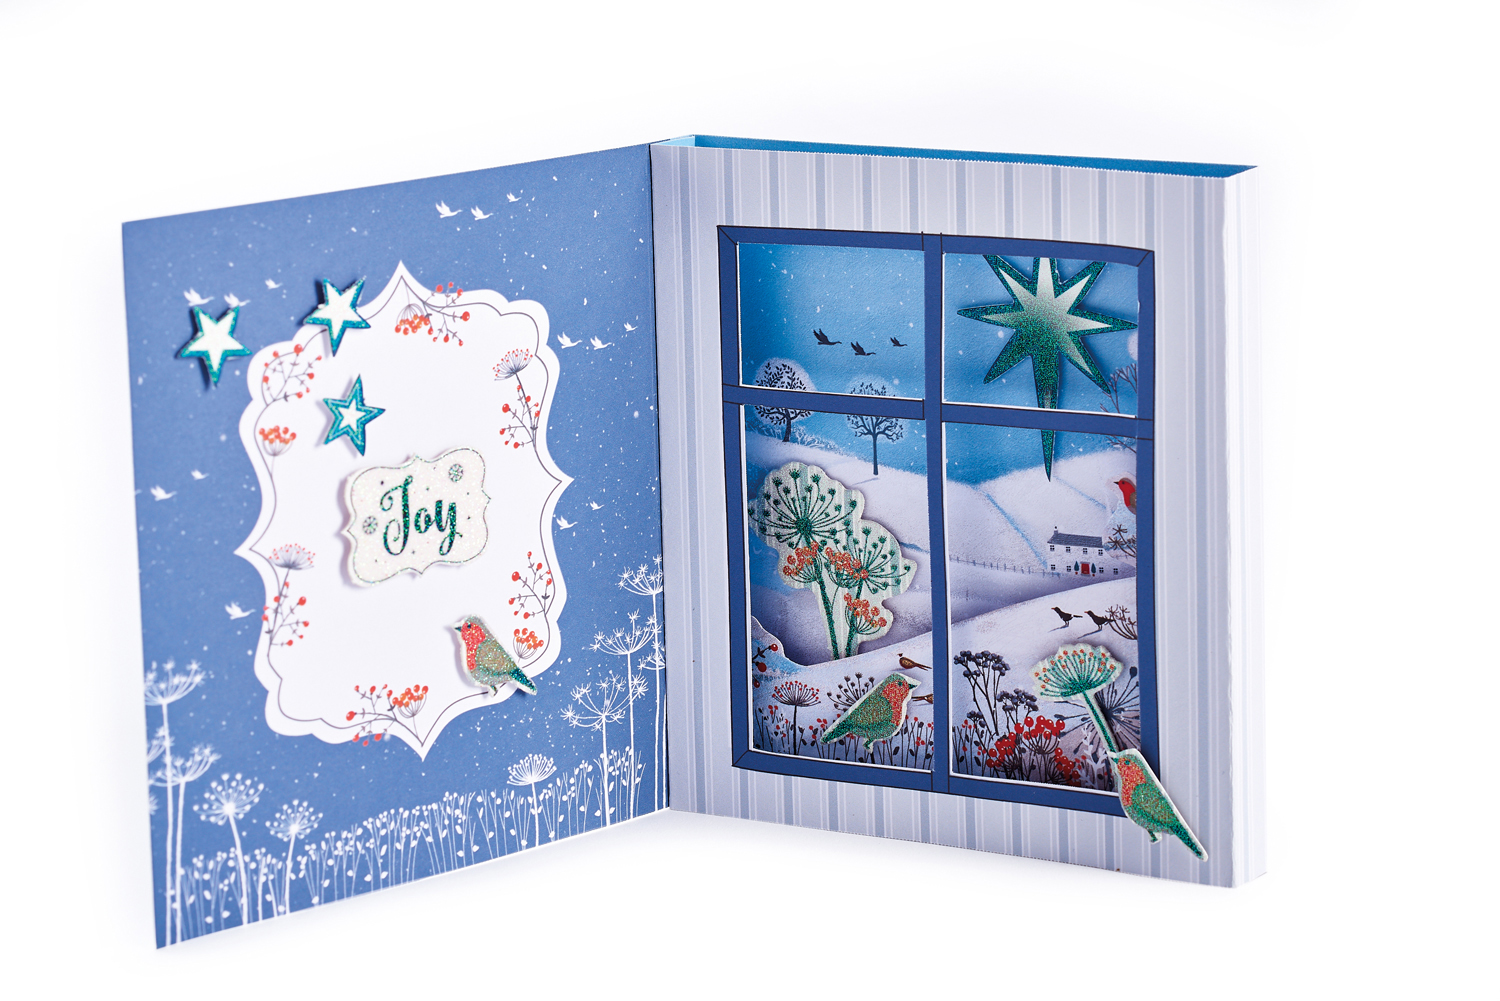
Get started… - 1 Take a pre-scored card blank and crease firmly along the score lines. Fold up so that the aperture sits inside the card, but do not glue the assembly tab.
2 Select your inner layers from the sheets, choosing one or two depending on the complexity of your design. Score down each side, 5mm in from the edge and trim away the excess.
3 Open the card blank so that the aperture is on the right and assemble the layers by securing the right-hand 5mm tabs to the 15mm gutter on the left of the aperture. Allow the layers to sit over the background of the blank and use foam pads to add individual die-cut motifs.
4 Once the scene is complete, glue the left-hand 5mm tabs to the gutter on the right of the aperture before folding the aperture towards the centre and adhering the outer gutter to the corresponding one. Decorate with more motifs and sentiments, layering together with foam pads. -
Top Techniques! -
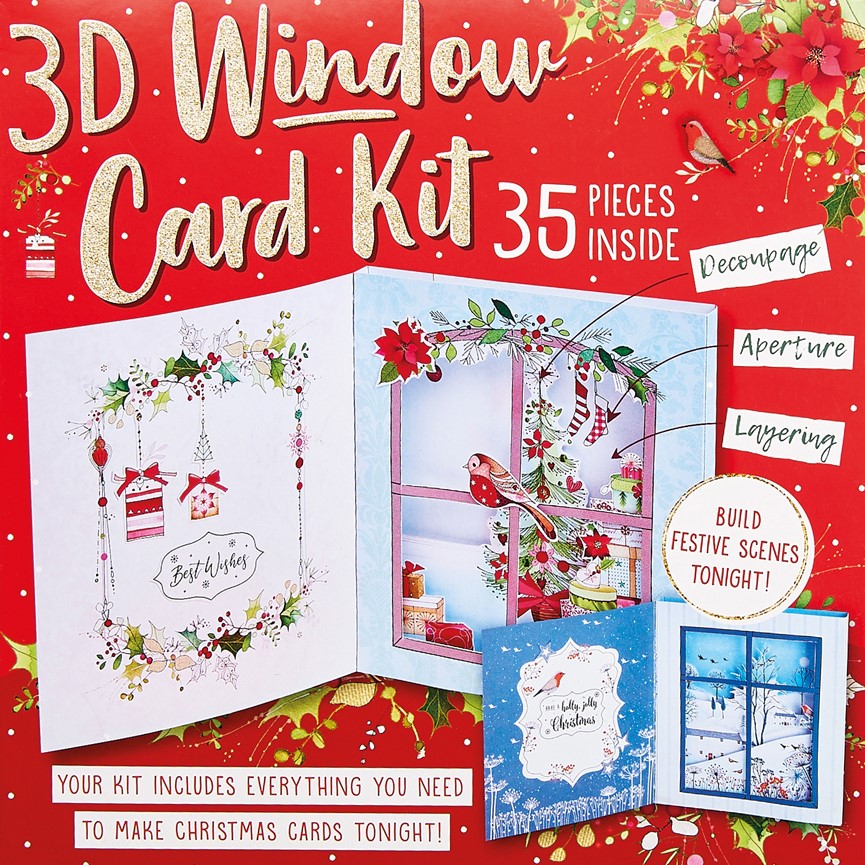
❤ The trick is to make sure each tier sits in the precise position to achieve the shadow effect.
❤ Embellishments are an essential part of any design, but they are crucial for completing scenes on window cards. Use your pop-out toppers to add your own personal touches.
❤ For extra dimension and to achieve the desired effect, use the foam pads included in your kit to fix the toppers onto the card.
❤ It may also help to plan your design beforehand so you know exactly where to position the elements on each card layer.
❤ Use the decoupage technique to build your scene; this really enhances designs and creates a kind of architectural look. -
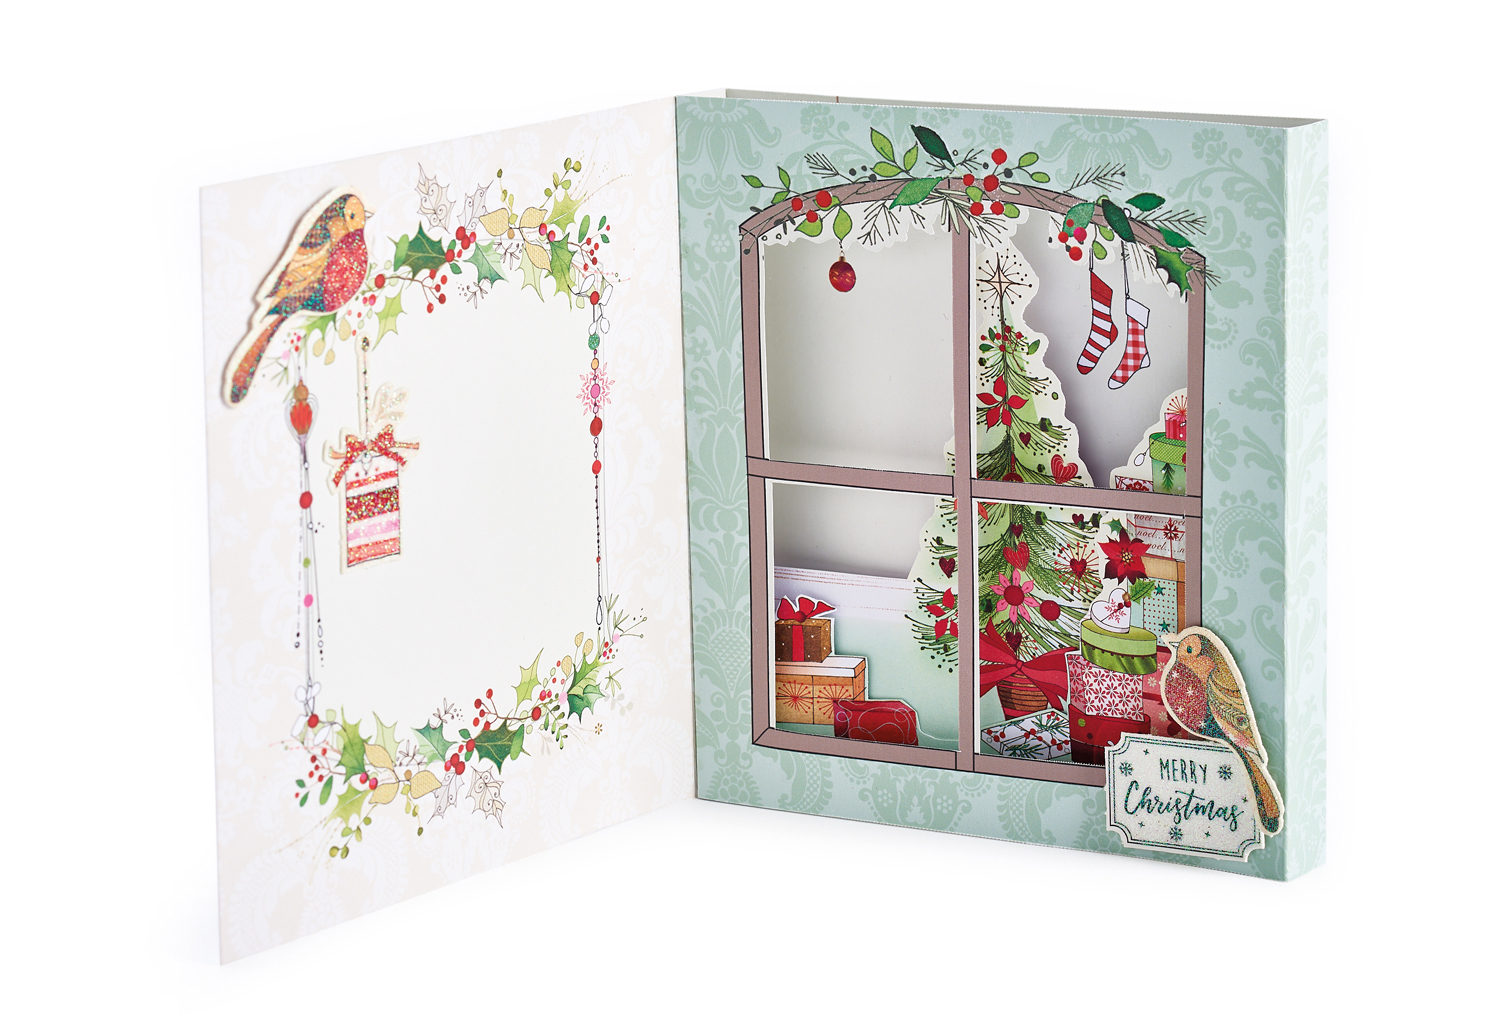
Merry Christmas Robin Garland -
1 Using the green card blank, score the large Christmas tree inner layer. Trim 1.5cm from the bottom of the inner layer before cutting away the excess background and glue to the gutter so the tree's star is visible through the aperture.
2 Add a die-cut present motif to the bottom right of the inner layer and glue the remaining gutters to assemble the card. Add die-cut foliage layers to the bottom left of the window aperture.
3 Fix a sentiment to the centre of the inside front cover and place a robin below this, resting on the printed foliage. Decorate the cover with a die-cut garland, adding a robin and hanging decoration to this with foam pads. Place a sentiment below in the centre. -
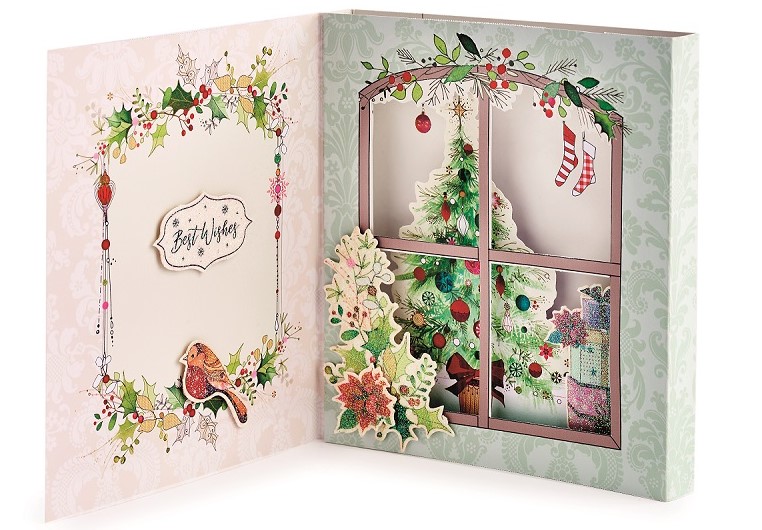
Best Wishes -
1 Take the green blank and score the smaller tree/pile of the presents inner layer. Cut carefully around the two images on the inner layer and glue to the gutter so the presents sit in front of the tree. Stick the remaining gutters in place to assemble the card.
2 Decorate the bottom right of the window aperture with a sentiment and robin motif fixed with foam pads. Add a robin and present to the inside front cover and finish the front of the card with foliage die-cuts. -
Holly Jolly Foliage Christmas -
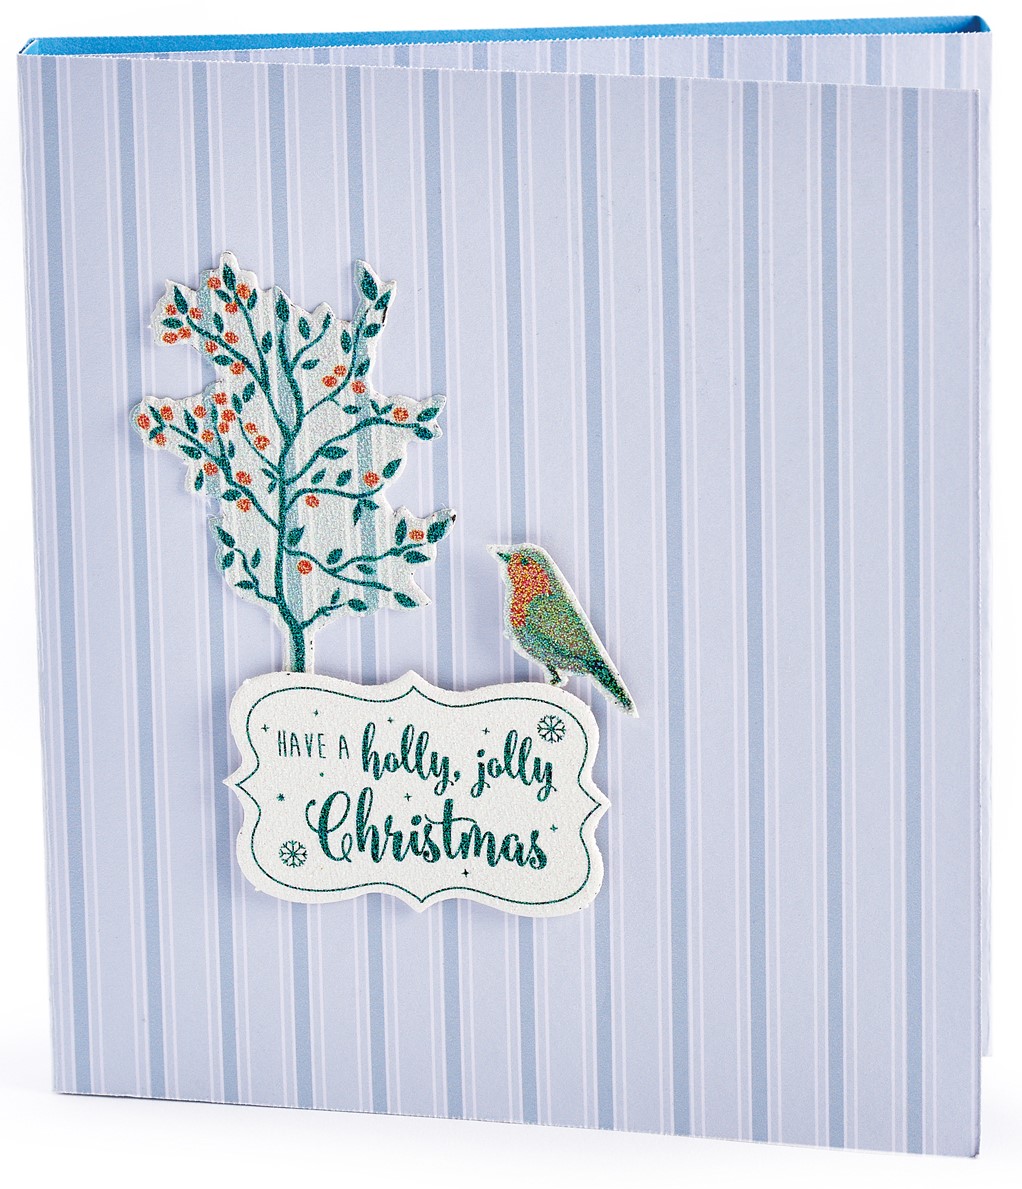
1 Use the blue blank and score the smaller robin inner layer. Cut away the excess background from the inner layer and fix to the gutter. Use foam pads to fix a star motif in the sky and add a seed head die-cut to the landscape before glueing the other gutter and assembling the card
2 Fix a small robin to the bottom right of the window aperture and decorate the inside front cover with stars, a sentiment and another small robin. Glue foliage to the left side of the front of the card, then add a sentiment and robin with foam pads. -
Holly Jolly House Christmas -
1 Use the blue blank and score the larger landscape inner layer. Trim away 1.2cm from the bottom edge of the inner before cutting away the excess background. Fix the inner to the gutter and add a star and foliage motifs with foam pads.
2 Glue the remaining gutter and assemble the card. Decorate the inside front cover with a sentiment and robin die cut. Fix the large landscape die cut panel to the front centre of the card and add a sentiment, robin and stars. -
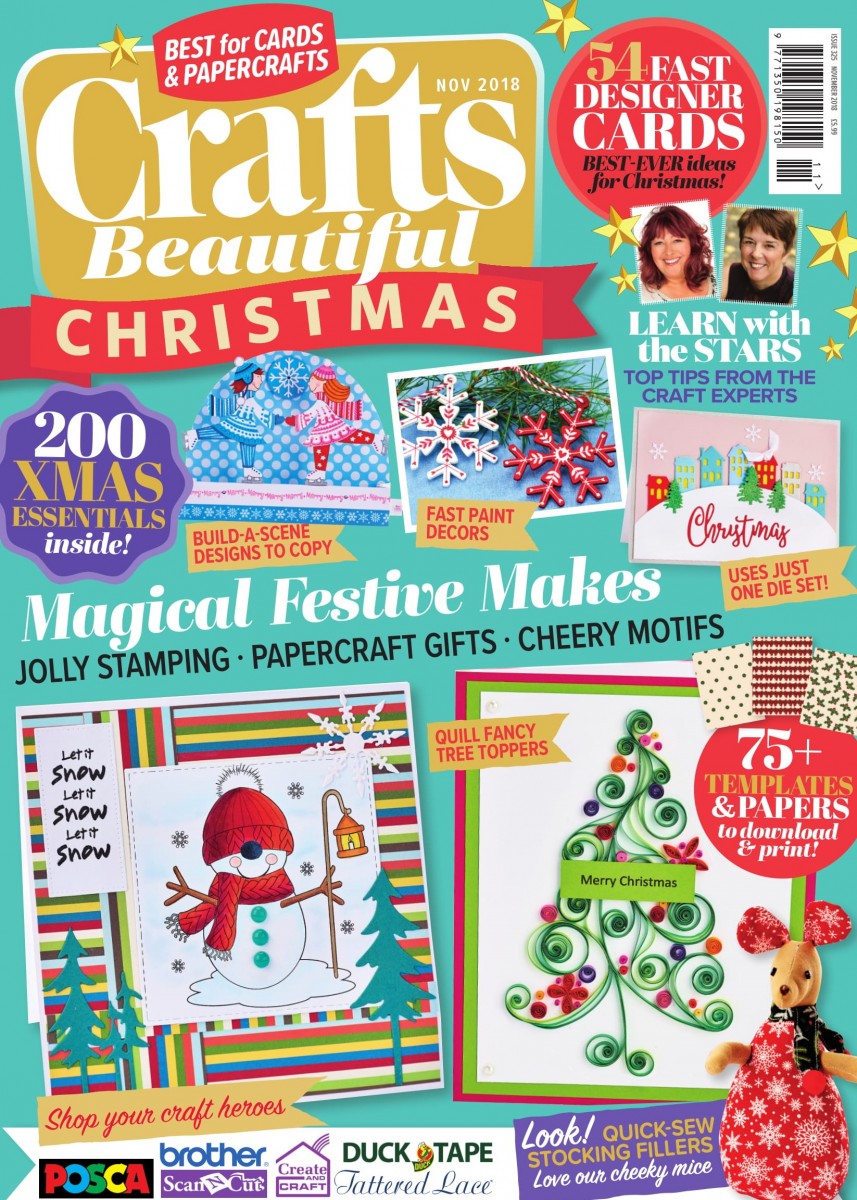
Pick up the November 18 issue of Crafts Beautiful from 11th October 2018!

Projects you may also like...


Recommended Projects...
 Crafts Beautiful Edition


