Recreate this Italian technique Terazzo Effects
What you need...
- FIMO polymer clay: raspberry, lemon, tropical green, calypso blue, cognac, white
Small cutters: circle, 1.5cm, 2cm; square, 2cm
Small aluminium tin
Earring hooks
Jump rings
Rolling pin
Knife
instructions
-
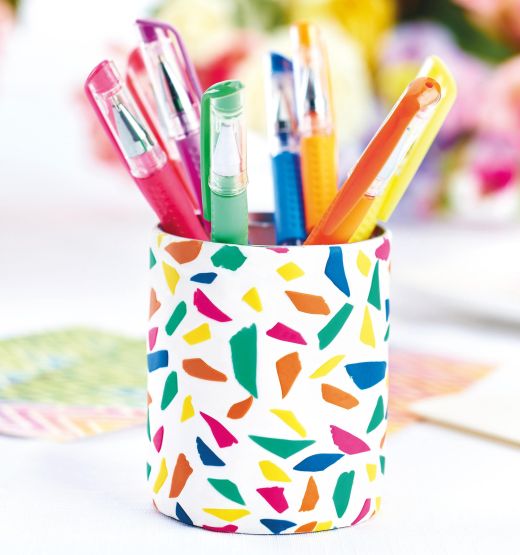
Pen pot - 1. Take a small tin and measure the circumference and height. Knead a block of white clay until pliable and roll into a ball. Place onto a clean smooth surface, then roll out to an even 2mm thickness. Using a knife and ruler, cut out a rectangle to the dimensions of the tin. Set this piece aside on a sheet of baking paper.
2. Cut off a small piece each of raspberry, lemon, tropical green, calypso blue and cognac clay. Knead and form into balls, then roll out each colour into a narrow strip, 1mm thick. Cut random sized pieces from these strips, some tiny and some a little larger. Place small chips onto the white rectangle, one colour at a time, leaving a little space between each. Re-position pieces as you go along until happy with the effect.
3. Lay a second sheet of baking paper on top of the prepared rectangle. Use the rolling pin all over the surface, flattening the small coloured pieces into the white clay. Once the surface is completely even, remove the baking paper from both sides of the clay and wrap it around the tin, overlapping the ends.
4. Draw a knife through the overlapped area, peel away the excess, then carefully smooth the two ends together with your fingertips. Trim the top and base in line with the tin and smooth the edges as before. Place the pen pot onto a baking sheet and heat in an oven, according to the manufacturer’s instructions. -
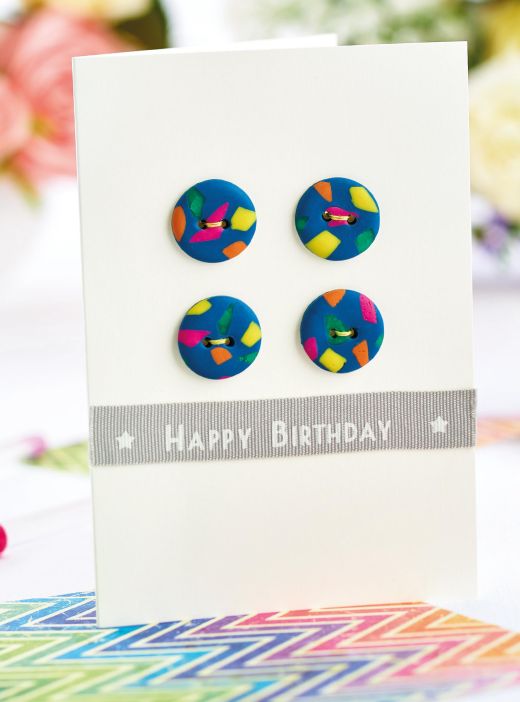
Button card - 1. Roll out a small piece of calypso blue clay, 2mm thick, and lay on baking paper. Cut off random pieces from narrow strips of the other colours, in the same way as the pen pot, and position on the blue surface.
2. Place baking paper over the top and roll the small pieces into the blue clay. Remove the paper and carefully lay a piece of cling film over the surface, making sure the surface has no wrinkles in it.
3. Remove four discs using a 2cm circle cutter. The cling film prevents the cutter sticking to the clay and also rounds off the button edges. Remove the film and make two holes in the centre of each button, using the point of a wooden skewer. Bake in the oven as before, then stitch to a card blank. -
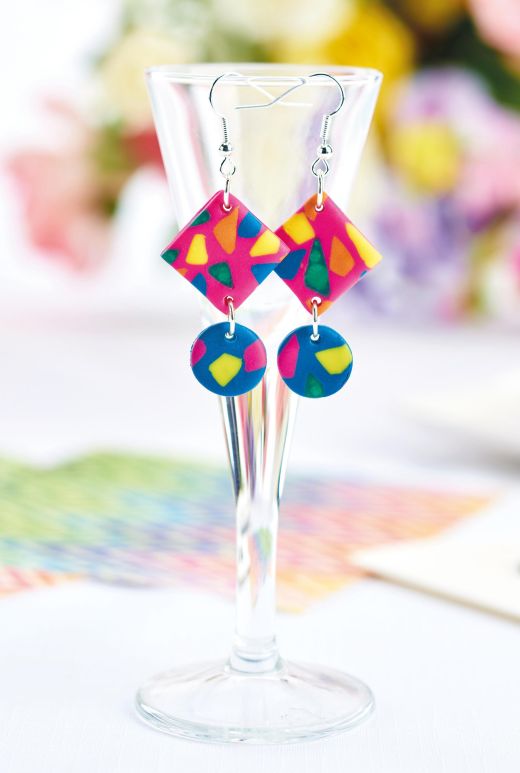
Earrings - 1. The earrings are made in the same way as the buttons, except the tops of the earrings are formed with a 2cm square cutter and have a raspberry base. The discs are cut with a 1.5cm circle cutter from the leftover pieces of the buttons.
2. Make a hole in one corner of the squares and also in the opposite corners. Pierce one hole towards the edge of the disc. Bake as before. When cool, connect the squares to the discs, and the earring hooks to the tops of the squares, with pairs of jump rings.


