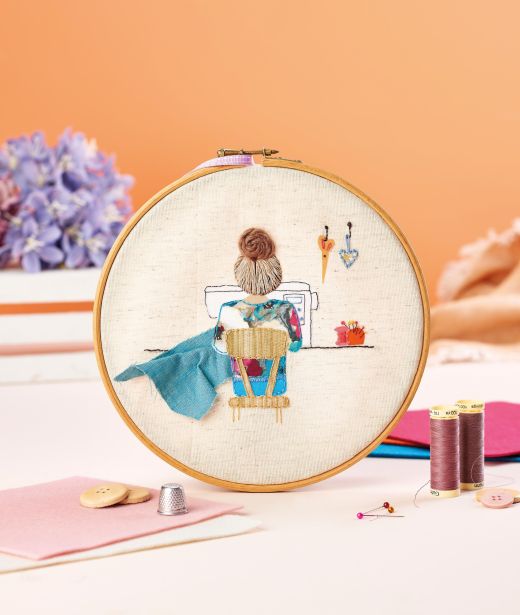
Stitch this striking wall art as a gift for a keen sewer
What you need...
- Linen fabric
8” embroidery hoop
Firm iron-on interfacing
Bondaweb
Stitch’n’Tear
Embroidery threads
Fabric scraps
Ribbon
Super chunky yarn
All seam allowances are 10mm unless specified.
instructions
-
1. Draw around an 8” embroidery hoop onto firm weight interfacing. Cut out the circle, 5cm from the edge of this line. Iron the interfacing onto the back of the linen base fabric. Using the template provided on the pattern pages, trace all the elements you want in fabric onto Bondaweb. Loosely cut out, iron onto the back of fabric scraps, then trim neatly.
2. Use Stitch’n’Tear to trace the entire design and all details. Pin just the top to the centre of the linen base fabric. You’ll use this to place your pieces. Cut a larger scrap of fabric which will become the 3D material coming out of the sewing machine. Pin this in place, using the traced design as a guide to where you want it positioned. Use one strand of embroidery thread to put a few stitches in the fabric to hold it in place. Think about the creases and folds of the fabric whilst you sew.
3. Peel off the backing paper from each fabric piece and iron them permanently in place, underneath your traced design. Some will overlap the 3D fabric piece, so do this carefully. Trim the 3D fabric down if needed. Place the design in your hoop and tightly secure it.
4. Using various embroidery threads, work a mix of back stitches and satin stitches to create different textures on the design. For the hair, use large detached chain stitches with the holding stitches always meeting at the very top of the head. Use French knots for the machine buttons, pin head and hooks.
5. For the hair bun, create a swirl on top of the head with super chunky yarn. Use small one-strand stitches to hold in place as you swirl the yarn into your desired size and shape. Add any details as you see fit. Rip away the Stitch’n’Tear carefully. Use a running stitch around the excess fabric on the back to draw it in, knotting it to secure. Tie a loop of ribbon to the top of the hoop for hanging.


