Try your hand at this pretty picture with matching cushion and suncatcher
What you need...
- Pencils, water soluble, Derwent, Inktense
Stamp, pansy
Ink-pads: VersaCraft, black; StazOn, black
Waterbrush
Paper, watercolour; lilac/white gingham
Card, white
Ribbon: ombre, red/pink, 5mm; satin, lilac, 3mm
Suncatcher, silk, 15cm
Picture frame, small square
Fabric, lilac gingham; ivory silk taffeta
Bias binding, 20mm, lilac
Sewing machine with lilac thread
Cushion pad, 30cm square
Compasses
instructions
-
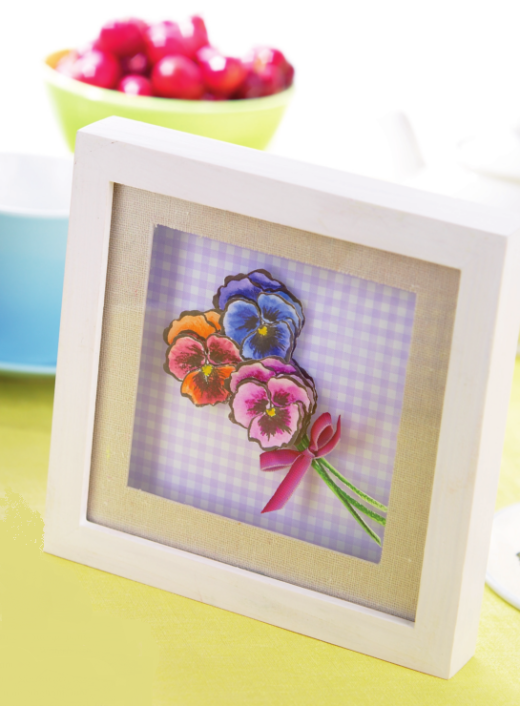
Decoupage Flower Frame - 1 Take a small square picture frame apart. Mount gingham paper onto white card, then trim to fit inside. Use the stamp to create a relief effect where each bloom has a total of three layers.
2 Stamp three images onto watercolour paper using the StazOn ink-pad, then colour with pencil. It can be shaded quite roughly, but the various hues should be applied in similar positions on each of the different layers.
3 Fill a brush with water and use it to wet the colours, blending them to produce the watercolour finish. Allow to dry. Cut out the different flower sections, then layer them up, attaching with adhesive pads to create the relief effect.
4 Repeat the stamping and colouring process to make two more layered flowers. Draw three stems onto a scrap of watercolour paper, then blend along the lines using the waterbrush. Cut them out carefully. Use a foam pad to adhere the upper ends of the stalks onto the gingham panel, using the picture as a guide.
5 Arrange the decoupage flowers at the top of the stems to make a small posy and use more foam pads to fix them in position. Tie ombre ribbon into a bow, trimming the ends at an angle. Glue in place on the stems, just below the blooms. Reassemble the frame. -
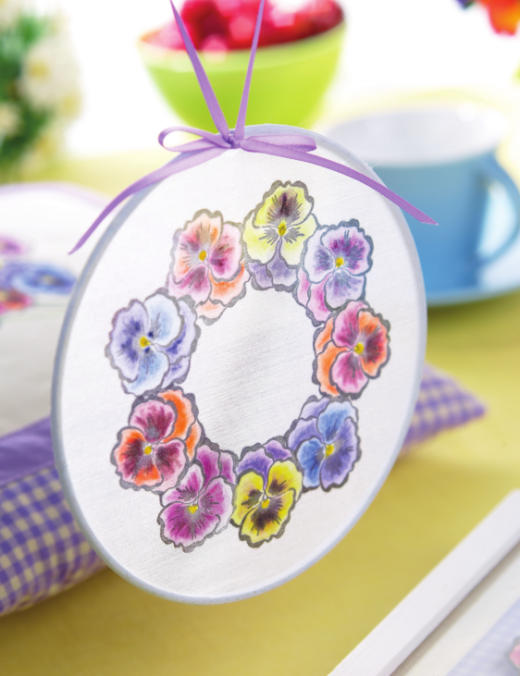
Sun Catcher - 1 Plan the position of the stamped images on scrap paper. Use the compasses to draw a 9cm circle, then print flower motifs in a garland following the pencil line. Repeat if necessary to achieve the best effect, as this will serve as a template for stamping the suncatcher.
2 If you wish to overlap the flower motifs slightly, make a mask by stamping an image on more scrap paper and cutting it out carefully. You can then lay it on the previous image to protect it while you print the one next to it.
3 When it comes to stamping the final flower you may need two masks so that the images on either side can be protected. Lay the suncatcher centrally on top of the template – you will be able to see it clearly through the fine silk fabric.
4 Stamp the garland with a Versacraft ink-pad using the template as a guide. Fix by pressing the images with a hot iron. Colour the flowers and blend using a wet brush. Allow to dry. Tie lilac ribbon in a bow, leaving a loop for hanging and glue it to the edge of the frame. -
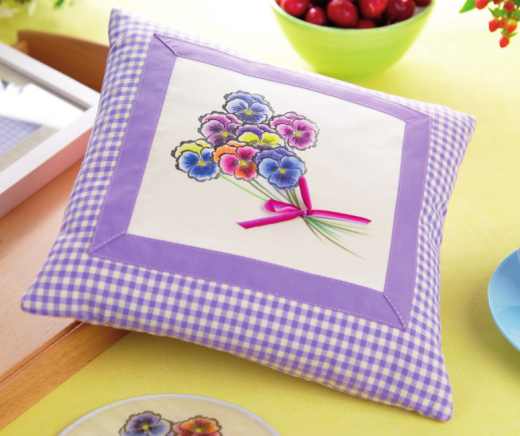
Cushion - 1 Cut ivory silk material, 20cm square, then use the Versacraft ink-pad to stamp a small posy of flowers towards the upper left, using the masking technique. Lay a clean white cloth over the fabric to protect it and fix by pressing with a hot iron.
2 Shade the flowers using watercolour pencils. Draw on a few stems in shades of green, crossing them over to accommodate a ribbon bow. Use the brush to dampen the blooms and allow the colours to blend. Apply a little water along the stems to soften them.
3 Trim decorated fabric, 19cm square, and cut lilac gingham fabric into two 30cm squares. Place the first panel centrally on one of the gingham sections and tack it into position by machine sewing 0.5cm in from the edge using a long stitch.
4 Tack binding around the decorated panel to conceal the raw edge, folding mitres at the corners. Conceal the join beneath one of them. Secure in place by sewing along each side of the binding and along the mitres, for a tidy finish.
5 Pin the gingham squares with right sides facing and sew around the edge, taking a 1cm seam allowance. Leave a hole in the lower edge large enough to push the pad through. Clip the corners, turn and press. Sew on a small ombre ribbon bow to finish the posy. Push the pad into the case and slip-stitch the gap closed.


