Create gorgeous gifts for Father’s Day from resin with Ellen Kharade’s swish makes
What you need...
- Vintage road map
Resin: Chemset Standard Resin ES 8102, Hardener ES 8203
Resin making kit: digital scales, mixing cup, lollipop sticks, barrier cream
Acetate, clear
Cufflink blanks
Cardstock
Paper, decorative
Gloss sealer, Mod Podge
Empty tub, circular
Tile, ceramic
Stanley knife
Scalpel
Sandpaper, fine
instructions
-
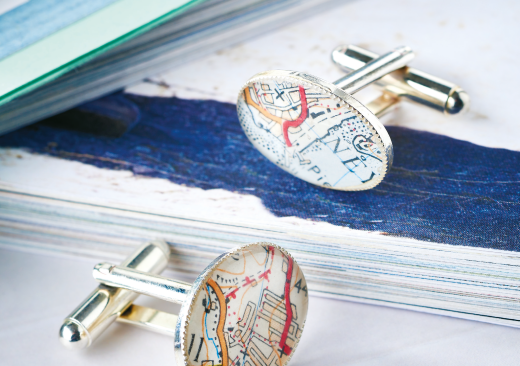
Cufflinks - 1 Place a cufflink bezel over map paper, then draw around the shape and cut out. Trim to fit. Cut out another and give each one three coats of sealer as for the paperweight. Leave to dry. Using more Mod Podge, glue the map ovals into the bezels and brush the sealer into the corners to create a seal and stop the resin from seeping under the motif.
2 Cover your work surface with newspaper. Push the cufflinks into plasticine to hold them upright. Mix 10g of resin with 5g of hardener and carefully pour into the bezels. Cover with a tub and leave
overnight to cure completely. -
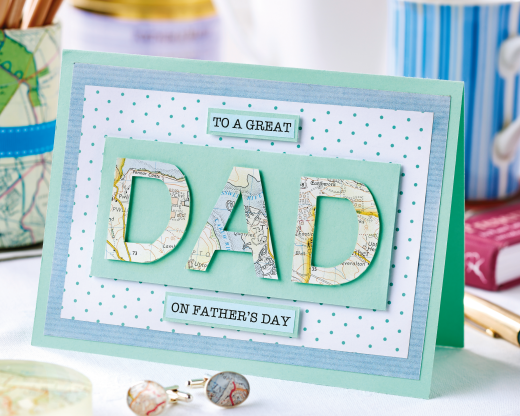
Card - 1 Cut map paper, 6cm x 12cm, and stick to scrap card using spray adhesive. Write out the letters to spell ‘DAD’, reverse them and trace onto the back of the map paper. Cut the letters out.
2 Trim green cardstock, 17.5cm x 25.5cm, and fold it in half to make a blank. Cut blue paper, 11.5cm x 16.5cm, and stick it to the card. Add a smaller matt of patterned paper, followed by a small
green rectangle adhered with 3-D foam pads. Cover the back of the map letters with foam pads and adhere on top.
3 Print sentiments onto blue paper – we used the font American Typewriter in size 18. Trim to size and stick to green card, cut the green, then fix them to the top and bottom of the card. -
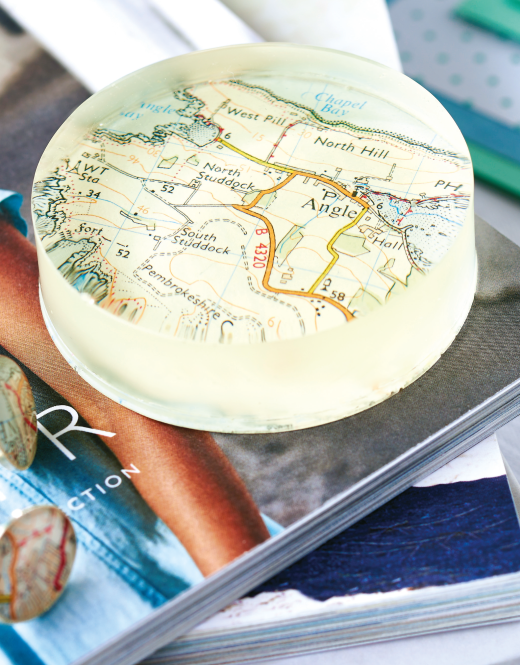
Paperweight - 1 Discard the lid of an empty tub, then rinse and dry thoroughly. Using a knife, cut the base off and discard. Place the neat end of the pot on a vintage map, draw around it and cut the circle out. Give the circle at least three coats of Mod Podge sealer, both front and back, leaving each coat to dry in between.
2 Place a large ceramic tile or glass chopping board onto a newspaper-covered table and tape a square of clear acetate onto it. Lay the map circle face-up on the acetate and place the pot, neat side down, onto the map, lining up the edges. Paint Mod Podge around the base of the pot to create a complete seal. Repeat the process three times to ensure no resin seeps out. Leave to dry.
3 Apply barrier cream to your hands. Place a mixing cup onto measuring scales and zero them. Pour in 30g of resin and 15g of hardener. Stir gently with a lollipop stick until mixed, then pour slowly into the mould and leave covered overnight to cure. Repeat the process a second time, leaving overnight as before.
4 Carefully cut the seal using a knife; it should peel away quite easily. Slice down the plastic pot – it can be brittle, so take care and use pliers to help peel away the plastic until the resin piece is released. Measure 25g of resin and 12.5g of hardener. Stir and leave to thicken for 20 minutes, then carefully pour over the paperweight to top it up. Cover the paperweight with a tub and leave overnight to cure.
5 Using a scalpel, pair away any excess resin at the base of the paperweight and sand with fine grit paper until smooth. Cut out a disc of blue card and stick to the bottom of the paperweight with
double-sided tape to finish.


