Create a matching gift set to present handmade toiletries from The Soap Kitchen
What you need...
- Soaps, The Soap Kitchen, Melt and Pour: soap base; Christmas Nostalgia
Soap mould, The Soap Kitchen, reindeer
Fabric, Dashwood Studio, Flurry: Red on White; Ink
Paper bag, brown, small
Card, thick
Embellishments: flowers, fabric; bakers twine; buttons, wooden; letters, wooden; stitched labels, Me to You, Tatty Teddy Christmas
Thread, embroidery, blue
Cling film
Adhesives
instructions
-
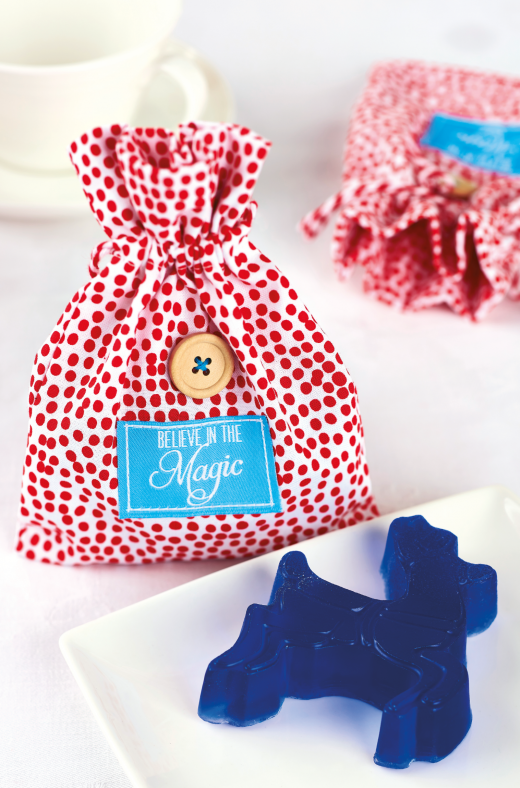
Drawstring Bag - 1 Cut a rectangle from red and white spotted fabric, 14cm x 44cm, and fold in half, matching the two shorter ends together. Pin a label to the front centre, 4cm away from the crease; this will become the base of the bag. Unfold the rectangle and sew into place.
2 Re-fold the shape, right sides facing, then pin the edges together and stitch down both sides. Press and iron the seams open. Fold and press 1cm in around the top of the bag, then press in another 4.5cm. Edge stitch the hem in place, then sew 1cm above the row to make a channel. Turn the bag out and unpick the stitches between the lines on the side seams.
3 Fix bakers twine, 30cm, onto a safety pin and feed it through the front channel until it comes out on the other side. Repeat the process with the back opening, then knot both ends together. The bag will now close when the threads are pulled. Stitch a wooden button above the label using blue thread. Finally, make blue reindeer soaps by following the instructions that come with the kit, then wrap in cling film and place inside the bags. -
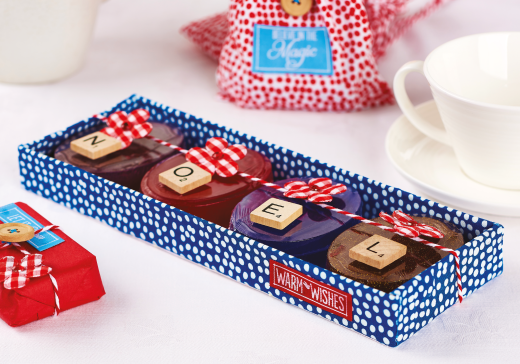
Open Box Tray - 1 Make a rectangle from thick card, 13.3cm x 30cm. Score 2.4cm in from each edge to form a frame; the lines should cross at the corners. Trim out the small corner squares formed by the framing. Fold along the score lines and reflatten.
2 Cut a rectangle of blue spotted fabric, 20cm x 36cm. Using spray adhesive, attach the cardboard to the centre of the wrong side of the material, scored side facing down. Snip the fabric at either side of the short card flaps. Fold and stick the material over the long card flaps. Two fabric tabs will have been formed at the ends of each flap. Use Copydex adhesive to fix them onto the back of the short flaps, pulling the sides up as you do to form the corners of the box.
3 Glue the remaining fabric over the outside of the box sides and fix all the raw edges to the underside of the container. Hide the raw edges by adhering card, 8.5cm x 25cm, to the bottom. Fix a 'Warm Wishes’ sentiment near the corner on one side.
4 Make four oval soaps from the Melt and Pour Christmas Nostalgia kit, then wrap in cling film. Fix gingham flowers embellished with red gems to one end and wooden letters on the other on all four bars to spell out the word ‘NOEL’. Place them inside the box and tie a length of twine over the top of the container. -
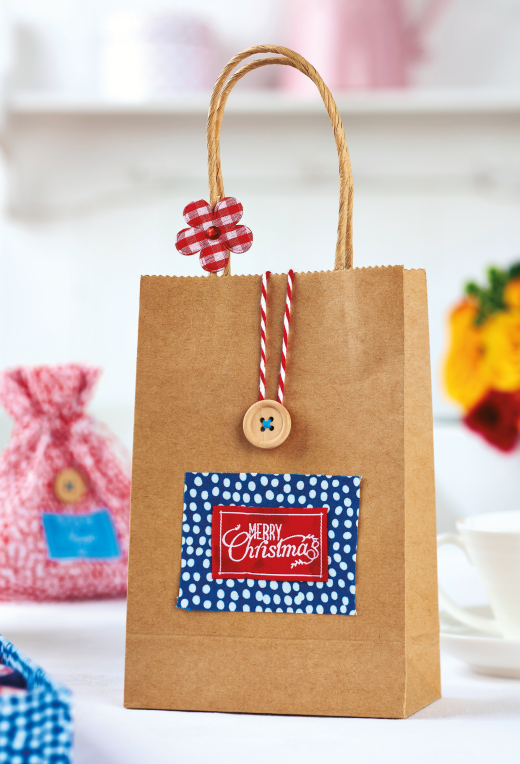
Gift Bag - 1 Make a loop from twine and glue it to the inside edge of a paper bag. Pull it taught over onto the front of the other side and mark where it reaches using a pencil, then sew on a button.
2 Matt a sentiment to the centre of a blue fabric rectangle and fix the button below. Add a decorated gingham flower to the base of one handle. Make coloured reindeer soaps, wrap in cling film and place inside.
Want vibrant colours to tint your handmade soaps with? The Zenicolor 5 will give you stunningly bold shades that are completely transparent and won’t bleed into each other. The reindeer in this project has been made using the blue colouring from the pack. For more info - and to buy a wide range of moulds as well - visit [url=http://www.thesoapkitchen.co.uk]http://www.thesoapkitchen.co.uk[/url]


