Corinne Bradd’s latest makes using the Brother ScanNCut incorporate all of your favourite things about spring
What you need...
- ScanNCut CM900
Card: coloured,
patterned
Templates: Download here
instructions
-
Making the Layered Flowers - 1 Place four flower template designs onto your layout screen and resize three so they decrease by 10-15mm wide each time. Multiply each size of flower four times, then arrange them in size groups in the four corners of the layout screen. Use the stamens at actual size and place four of these in the centre of the screen.
2 Cut five pieces of coloured card slightly larger than the space each set of components takes up. Fix the card squares to the sticky mat in the correct corners, then cut all the pieces out with one pass. Keep the designs in the same place on the layout screen and just add different colours of card to the mat to change the look of each flower. -
Fabric Wraps - 1 Cut a solid or cut out wrap design from a deep shade of mid-weight card, then solid and cut out bee designs from co-ordinating colours. Layer up the pieces by gluing along the centre of the body, allowing the wings to remain free.
2 Prepare your gifts by folding cloths into parcels, 8cm x 20cm, ensuring the top of each is neat and crease free. Lay the card wrap over the centre of the parcel and fold the ends to the back, gluing to secure. -
Soap Pouches - 1 Cut pouch designs from double-sided patterned card. Fold each side in so that the bottom curves line up. Use the curves from one pouch as a guide to scoring concave curves at the base of each. Crease along the curve line.
2 Glue the back seam of the pouch and allow to dry before pushing in the base curves. Decorate the front of each with layered flowers and bees before placing soap inside. -
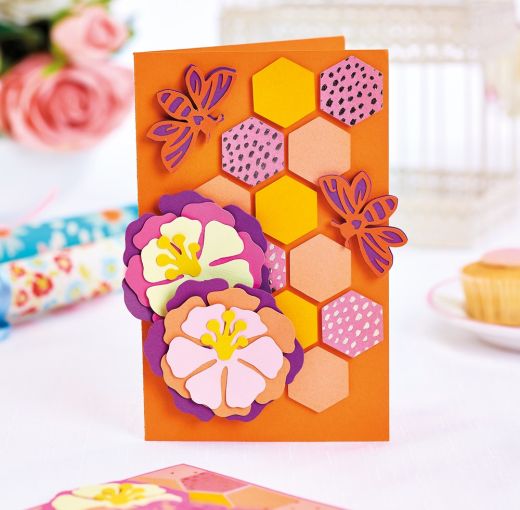
Honeycomb Effect - 1 Take a blank, 10.5cm x 16.5cm. Arrange several 30mm wide hexagons in different colours over the right-hand side of the card and fix in place with foam pads, leaving a narrow gap between each one.
2 Choose three different sizes of flower shapes and make two layered blooms, curling the petals over a scissor blade before fixing together. Add a stamen to the centre of each one and place on the left side of the card with foam pads.
3 Cut two small bee cut out shapes from a bright shade and four solid shapes from something darker. Glue a cut out over a solid before adding a second solid below this with foam pads to create a shadow. Fix the bees to card in the spaces in the honeycomb. -
Top Techniques With Your ScanNCut - * Make sure you’re always prepared for emergency crafting by cutting out more shapes than you need. If you stick to a similar colour scheme each time, you can store extras in an envelope and use them as an instant cardmaking kit.
* The interchangeable blades allow you to cut from a variety of materials. Always check that they are sharp, free from lint and set at the correct height and pressure for the material you’re using.


