Try an oceanic theme for your wedding, with soft blues and dainty shells
What you need...
- Invitation
Inserts, shell, mint outer
Card, mint
Ribbon, chiffon, pink
Shell, white
Punch, hole
Foam pads, 3-D
Glue dots, micro
Scissors
Wedding Menu
Inserts, shell, mint outer
Card, mint
Ribbon, chiffon, pink
Shell, white
Punch, hole
Foam pads, 3-D
Glue dots, micro
Scissors
Table Numbers
Buckets, white, small
Card, mint
Ribbon, chiffon, pink
Shells, white
Foam pads, 3-D
Scissors
Craft knife
Computer
Place Names
Place cards, shell
Card, mint
Ribbon, chiffon, pink
Scissors
Craft knife
Computer
Glue dots, micro
Favour Boxes
Boxes, corrugated paper, natural coloured
Tag, thank you
Ribbon, chiffon, pink
Shells, white
Foam pads, 3-D
Scissors
Craft knife
instructions
-
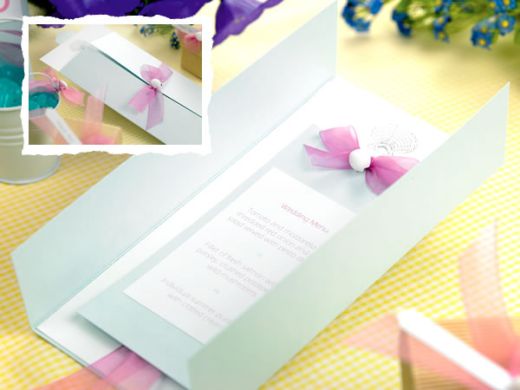
Invitation - Print out, or hand write the invitations and stick to the shell inserts. Trim a strip of mint card, 3cm x 10cm, cutting one end into a point. Fix to the back of the shell insert, with the point extending from centre top of card.
Punch a hole in the middle of the two outer flaps. Thread a length of pink chiffon ribbon through and tie in a bow. Place a couple of 3-D foam pads inside a white shell and adhere to the centre of the bow. -
Wedding Menu - Print or write the menu onto white paper and glue to a rectangle of mint card. Snip a length of ribbon, trimming the ends at an angle to prevent fraying. Fold in half and adhere to the back of the menu at the base.
Attach the prepared menu to a shell insert, then to the inside of an outer. Tie a bow in a length of ribbon and add to the top of the menu with a shell fastened to the centre. -
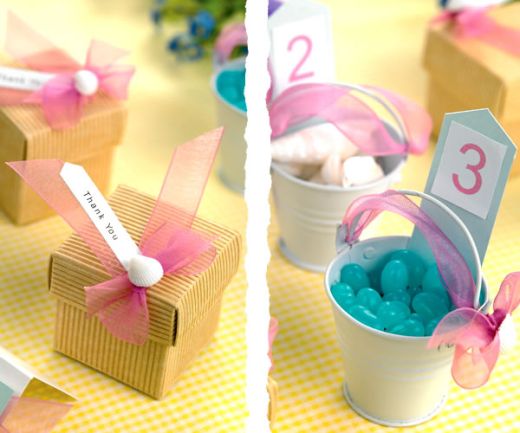
Table Numbers - Cut a length of chiffon ribbon and thread through one of the holes containing the bucket handles. Pass over the wire and through the other hole, bring the ribbon back over the handle, into the first hole and tie in a bow.
Trim a strip of mint card, 3cm x 10cm, snipping one end into a point. Type and print the table numbers onto white paper in a rose colour. Cut out the numbers and stick to the pointed end of the card strips. Place numbers into the buckets and fill with white shells. -
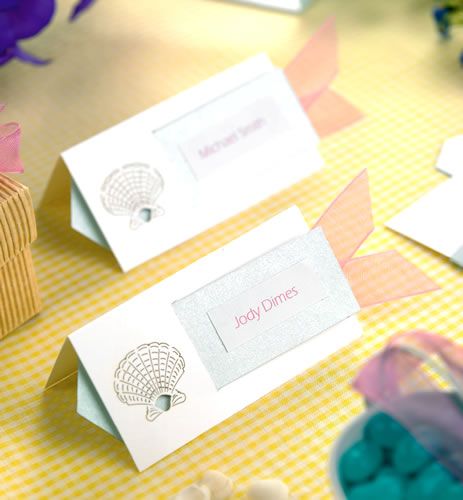
Place Names - Trim a strip of mint card, 3cm x 10cm, snipping one end into a point. Cut a 3cm slit alongside the shell motif on the place cards, and thread the pointed end of the card into it.
Take a length of chiffon ribbon and fold in half, having first trimmed the ends at an angle to stop them from fraying. Stick to the straight end of the mint strip, which is in turn glued to the place card.
Type and print out the name of the guests onto white paper in a rose colour. Cut the names out and fix them to the mint strip. -
Favour Boxes - First assemble the boxes and their lids. Trim a length of chiffon ribbon, with the ends at an angle to stop them from fraying. Fold in half and attach it to the lid of the box at an angle.
Tie a bow in another section of ribbon and glue to the folded end of the tails, with a shell stuck to the centre of it. Snip a point to one end of a ‘Thank You’ tag and fix just under the bow to complete.
Confetti
http://www.confetti.co.uk
For a whole host of inspirational and costeffective ideas for the day of your dreams, and a free-ofcharge print centre to download templates, visit confetti online or in store at:
London
80 Tottenham Court Road,
W1T 4TE
Leeds
The Light, Headrow, LS1 8TL
Glasgow
15/17 Queen St, G1 3ED
Birmingham
43 Temple St, B2 5DP
Reading
159 Friars St, RG21 1HE
To request a FREE catalogue call 0870 840 6060


