Combine treasured photos and scrapbooking techniques to make gorgeous greetings
What you need...
- Photo, colour, 12cm x 8.5cm
Card blank, red, textured, 15cm square
Paper, festive: striped; spotted
Card: textured, white; red
Ribbon, narrow, green, red
Decorative word tiles
Voice pad or message recording device
Hole punch, small
Computer
Printer
instructions
-
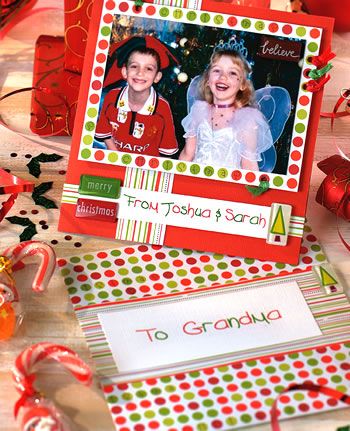
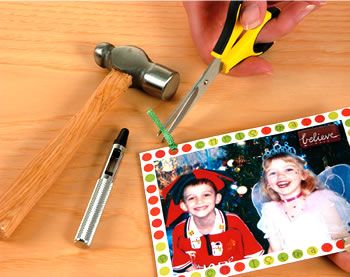
Family Christmas - Snip spotted paper, 14cm x 10cm, keeping the pattern complete. Trim the photo to fit, leaving one row of spots visible all round. Secure the picture, then glue on a word tile. Punch five holes, fold a short red or green ribbon in half and feed through an aperture from the back, creating a loop on top. Thread both ends through the loop, pull tight and trim. Repeat four more times.
Lay a striped paper strip, 3cm x 20cm, down the card front, 3.5cm in from the fold. Position the photo on top, with an even border on three sides and mark each corner on the blank in pencil. Check that the striped paper looks correct and move it if necessary. Mark where both vertical edges of the strip cross the top and bottom edges.
Apply double-sided tape within the marks for the strip, secure it on top and trim away any excess. Use the computer to create a sentiment, 9cm long, and print onto white card. Snip to 2cm deep, place word tiles at each end of the text, cut away the excess card and glue the tiles in place. Secure centrally on lined paper, 1cm x 20cm, and cut to fit the greeting.
Lay the wording centrally under the photo, mark its position and apply double-sided tape within. Press the journalling in place. Secure sticky fixer pads to the back of the frame under the photograph, line it up with the marks made in step 2, and fix in place. Erase all pencilling.
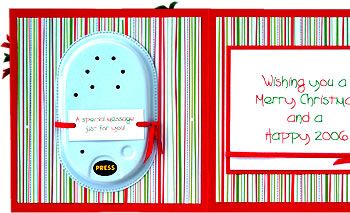
Open the card and on the inside left, mark 0.5cm from each edge. Secure striped paper, 14cm square (with the lines vertical), using the pencil marks as guidelines. Repeat for the inside right, then erase all the pencil marks carefully.
Use the computer to create a tag for the message pad. Size it to fit neatly, print and trim. Punch a hole on the left and right sides, thread through red ribbon, 25cm long and wrap round the voice pad. Tie a knot on the left-hand side and cut the ribbon ends at a slant. Secure the voice pad centrally on the inside left with sticky pads.
Type a sentiment on the computer, 8cm x 5cm. Print and snip, 11.5cm x 9cm, leaving a wide border around the text. Secure to red card, 13.5cm x 11cm, and trim. Tie 30cm of red ribbon around the bottom, knot at the right-hand side and snip the ends at a slant. Secure centrally on the inside right with double-sided tape.
Simply Sensational Scrapbook Cards', by Sue Nicholson, features more projects to make fantastic greetings like this, plus mini-albums, envelopes and presentation boxes. Published by David & Charles and priced at £12.99, it is available from all good bookshops.
To purchase a copy directly online, go to http://www.davidandcharles.co.uk
http://www.courtyardcraft.co.uk – scrapbooking papers, punches, general arts and crafts tools


