Fabric scraps and simple stitching is all you need to make Carolyn Letten's easy Father's Day gift set
What you need...
- Fabric: chevron print; toadstool print; linen, plain; cotton, plain, bright blue; spot, scraps
Bias binding, blue
Interfacing, iron-on, heavy-weight
Machine threads: black, brown
Buttons, three
Key ring, split-ring
Glue stick
Card blank, A5
Wadding, small piece
instructions
-
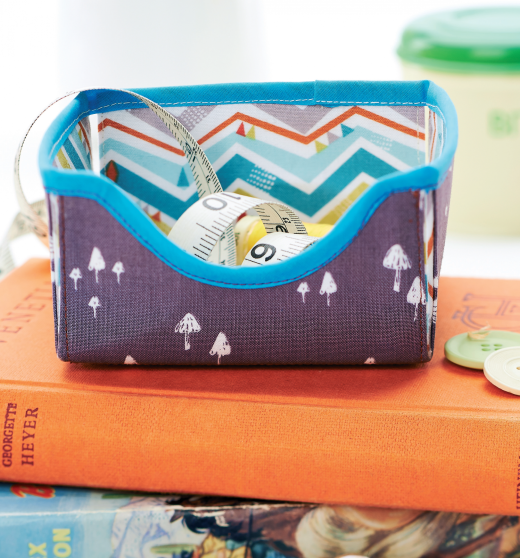
Key Tray - 1 Using the template, cut the following pieces: one from pelmet interfacing; then one from lining fabric; one from the main fabric - both of these pieces need to be 1cm larger all the way around. Back them with iron-on interfacing.
2 Use the cut out pelmet interfacing as a guide and lay the fabric piece interfacing side up and the pelmet inner piece on top, leaving a 1cm border all the way round. Snip the fabric diagonally into the corners so that it almost touches the pelmet.
3 Fold each border of fabric over onto the pelmet inner to create a sharp crease and press. Trim across what will be the top of each side, up to the pelmet lining to omit the border. Remove the pelmet and repeat for the lining fabric.
4 Lay the pelmet inner back into the outer fabric. Place the inner fabric interfacing side down on top of it and pin together, ensuring that all the sides match and are tucked in. Machine or hand stitch a square into what will become the bottom of the tray. Sew around all the remaining sides and across the top of each side, where the edge will be raw, leaving a 2mm seam allowance.
5 Starting at the middle on one of the raw top edges, machine or hand stitch down the bias binding, pausing as you get near the end. Fold the next side up to meet it and keep stitching the bias binding. Repeat this on all four sides of the tray, making sure to turn the raw end of the bias binding under to finish. -
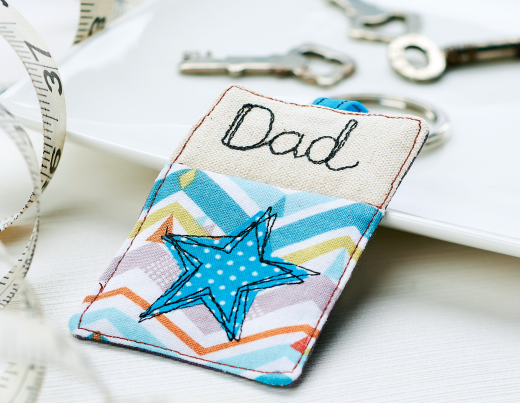
Key Ring - 1 Cut chevron patterned fabric, 6cm square, and linen, 4cm x 6cm. Stitch the two together and press the seam on the reverse. Make a star out of turquoise spotty fabric and machine stitch it randomly to the chevron fabric.
2 Stitch 'Dad' to the linen piece, then iron on the reverse. Take a piece of wadding and backing fabric the same size, then trim an 8cm length of bias binding. Fold it in half lengthways and stitch two lines in black. Fold over a split ring and secure the raw ends together with a stitch.
3 Place the finished front right side up, the backing fabric wrong side up, then the wadding, and pin together. Place the split ring in between the two fabric pieces at the top centrally, so that the raw edges stick out slightly.
4 Starting at the bottom, with a 0.5cm seam allowance, stitch all the way round leaving a gap for turning. Clip excess fabric across the corners and turn right side out. Stitch the gap closed. -
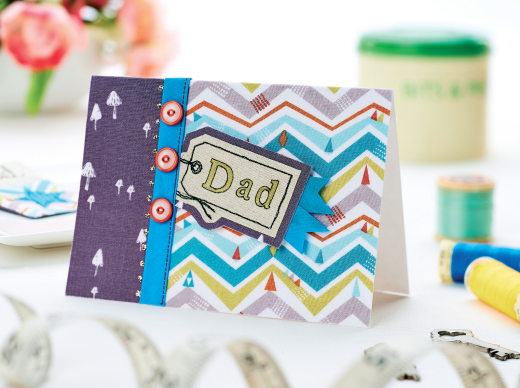
Dad Card - 1 Cover the front of an A5 card blank with glue. Stick down chevron and toadstool print fabric, overlapping onto the back of the card by 1cm to give a neat finish. Take a 12cm length of bias binding, fold it in half and stitch down one side using brown thread and sew on three buttons. Secure the binding to the card so it covers the fabric join.
2 Ink up the acrylic tag stamp in black and print the motif onto the linen. Stamp 'Dad’ in the middle using a green ink-pad. Allow to dry and draw around the word with a black fine liner pen to highlight the design. Cut out and mount the tag onto toadstool fabric, strengthened with thin card, then stitch around the tag line.
3 Stick two small pieces of bias binding under the edge and use 3-D foam pads to mount it on the card. Finally, add a few dots of glitter glue onto the design.


