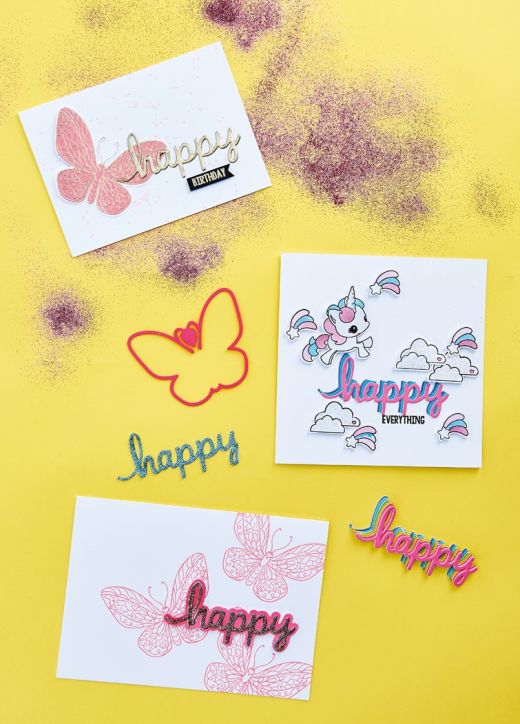
Try three alternative card techniques to add more fun into your everyday designs
What you need...
- Dies: Pink and Main, Happy, You Can Fly
Stamps: Pink and Main, Happy for You, You Can Fly, Magical Unicorns Stamp Set
Card, coloured
Ink-pads: black, pink
Dual Speed Heat Tool
Embossing Ink-Pad
Embossing Powders, Platinum Embossing Sparkles, Fireworks
Self-adhesive A4 sheets
Glossy accents
Glitter glue
instructions
-
1 Splatter the front with ink that has been watered down using a paintbrush. Leave to dry, then stamp a solid butterfly onto white. Use a heat tool before stamping the butterfly detail.
2 Press the butterfly detail stamp onto the solid butterfly using an embossing ink-pad. Cover with embossing powder, remove any excess and use a heat tool to melt the powder.
3 Trim the stamped and embossed butterfly using the die. Die-cut ‘happy’ from white card, then cover with embossing ink. Lay on the ink- pad and press down.
4 Sprinkle with Platinum embossing powder, tip off any excess and heat to melt the powder. Repeat twice more to ensure a lovely smooth finish to the die-cut word. -
Shine With Metallics - Create your own faux metal embellishments by covering die-cuts with an embossing ink-pad, then sprinkle on metallic embossing powder and heat. Repeat twice more and you will have the most smooth-looking motif
-
All That Glitters - If you want to add sparkle, then create your very own glittered embellishments! Simply cover card with self-adhesive sheets, die-cut the shape, then peel back the layer of backing paper and cover with sparkly glitter!
-
Layer a Rainbow - It's amazing how different a word or flower looks when you have die-cut several and glued them together, directly on top of each other. They will really stand out on your projects!


