Blog
Blog
Get Creative with your Brother ScanNCut
- SHARE
-

-

-
 hello
hello
-

- Tags:
- brother, brother scanncut, cardmaking, papercrafts, scanncut,
Every crafter needs a Brother ScanNCut in their gadget collection. Why, you might ask? Well, not only can you craft with ease, you can create just about anything. The sky really is the limit! The in-built scanners and screen make the ScanNCut range ideal for crafters who want an all-in-one device, and we’ve got some project inspiration that will have you wishing for one!
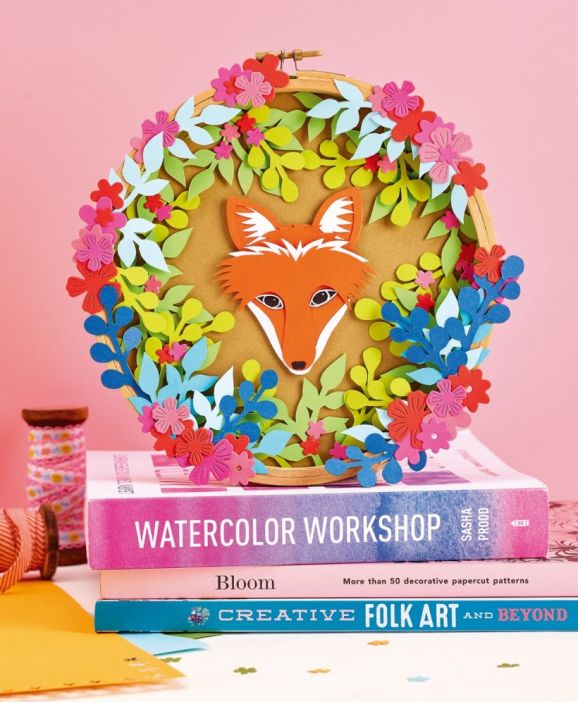
1 Woodland Paper-cut Display

FREE Fox & Flower SVG Cutting Files
WHAT YOU NEED…
FREE Fox & Flower SVG Cutting Files
Embroidery hoop, 19cm
Dies: flowers, leaves
Fineliner, white
Adhesives
METHOD:
1. Cut two 19cm circles, one from gold card and another from green. Place the gold disc to one side and draw a ring around the green circle, 1cm in from the outside edge.
2. Sketch and cut out pointed and rounded leaf sprigs onto card to use as a template. Draw around these onto the green circle, building up a background ring of foliage and cut out with a craft knife.
3. Glue the green foliage ring to the back of the embroidery hoop and adhere the gold disc behind this with 3D foam pads. Use the same foliage templates to cut out several more sprigs from slightly lighter green card.
4. Add the extra leaves to the papercut background inside the hoop with 3D foam pads. Cut more leaves from various shades of blue card and arrange these around the top edge of the embroidery hoop.
5. Die cut different sized flowers from three shades of pink andred card. Glue the flowers into bunches, covering the ends of the foliage pieces. Use the smallest blossoms to decorate the leaves inside the hoop.
6. Download the fox template from our website and cut out the elements from orange and white card. Paper piece the face together, use black card for the nose and eyes, then use a white fineliner to add detail.
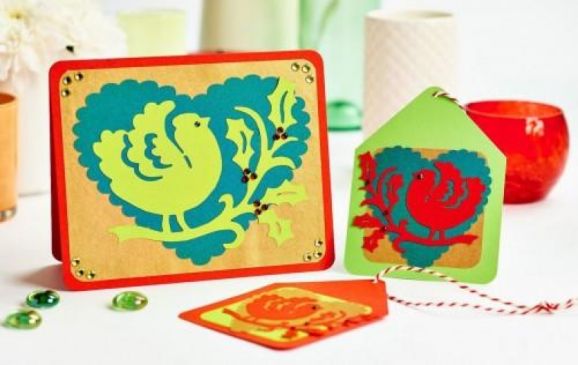
2 Birdy Card

Bird Template
WHAT YOU NEED…
Card, various colours
Bird template
Embellishments
Adhesives
1 Trace our bird template onto white paper with a soft pencil then go over it with a fine black pen before rubbing out the pencil lines.
2 Mount the image onto the ScanNCut’s sticky mat and feed it into the machine to scan it. Save the image to the machine’s memory.
3 Resize your motif to 6.5cm tall. Position one image on the ScanNCut’s display screen and add a second, flipped motif next to it. Cut the images from dark green paper.
4 Choose a scallop-edged rectangle from the machine’s pre-stored motifs and resize to 7cm x 17cm. Cut out and mount onto lime green paper, trimming to size and rounding the corners.
5 Place the mirrored motifs facing each other on the scallop-edged rectangle so they are touching. Mount the completed panel onto a 10cm x 20cm landscape gold blank.
6 Add small red gems to the top and bottom scallops of the card. Use more red gems for berries and make eyes from tiny green diamantes.
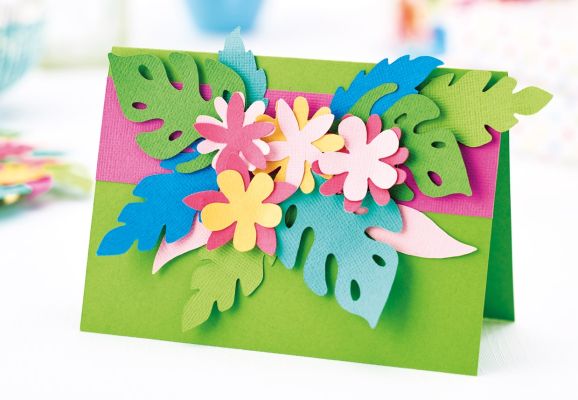
3 Leaf Card

Leaf Templates
WHAT YOU NEED…
Card, various colours
Washi tape
Adhesive
1 Download our templates as either SVG files to work directly from your machine or as printable designs that can be scanned and manipulated manually. Remember to unify patterns such as the cheese plant leaves to ensure all parts enlarge and reduce together.
2 To save time cutting, arrange designs in the four corners of the layout grid, according to the colour you need them. Once the spaces are filled, trim card to the necessary size, place on the cutting mat in the corresponding position, then cut all the pieces in one pass.
3 By gently curling the ends of several leaves in varying colours, you can create clusters to arrange on the front of a card. For a playful touch, add a few pale pink parrot feathers to lighten the display.
Feeling inspired? Shop the ScanNCut range here.


_151_86_int_c1.png)


