
Project
Paper Piece a New Baby Card
- Designer: Colette Smith
- Tags:
- paper piecing, paper, new baby, die-cutting machine, crafts, card, baby,


Paper piece die-cut shapes to create fun toppers for your cards with this easy step-by-step
What you need...
- Dies: Sizzix, Framelits Plus Circles, Scalloped Circles
Hole punch
Ink-pads: VersaFine, Onyx Black; VersaColour, Violet, Sea Shell
Pens: white gel; fine liner, black
Ribbon, pink
Sentiment stamp
Adhesives
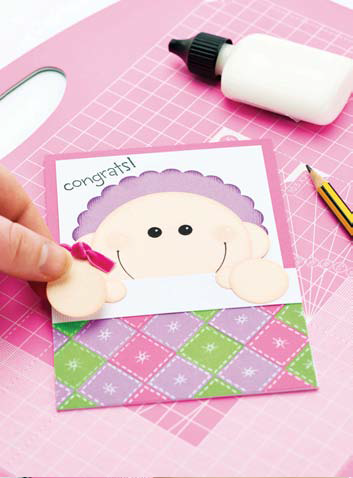
Paper piecing is a very therapeutic way of creating a fun and imaginative greeting, and babies make the perfect subject! I've come up with an adorable card design using basic die-cut and punched shapes such as circles and squares to create a cute little character. Die-cut circles are literally stacked together to form the babys head and hand, whilst the bonnet is an offset scalloped circle. The quilt is made using simple squares of card arranged in a pattern and stuck onto a base. Faux stitching and buttons are added for detail using a white gel pen. I’m sure that this cute design will make everyone go ‘aww!’.
instructions
-
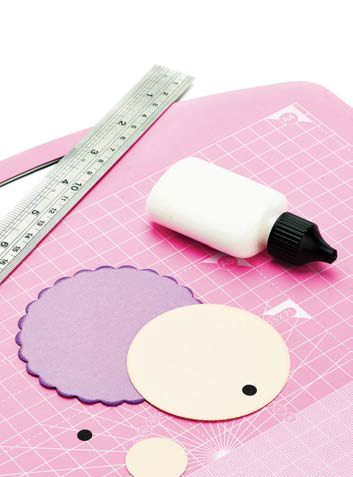
To make the baby’s head, die-cut the following from card: 8.5cm purple scalloped circle, 7cm circle and 2.5cm circle in pale peach. Punch two smaller circles in black. Ink the edges of the scalloped circle in violet and pale peach circles in sea shell. -
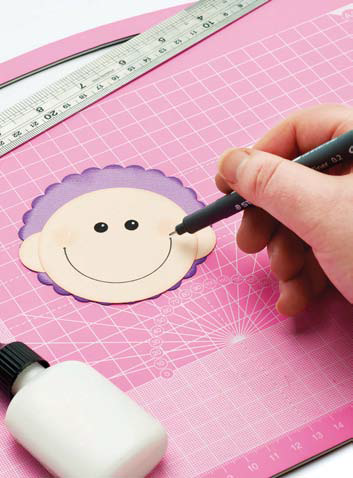
Snip a 2.5cm circle in half and stick one half to each side of the large peach circle. Draw a simple curved mouth with black fine liner and add the two small black circles above. Add a pink blush to the cheeks and apply dots of white gel pen for the highlights. Create a bonnet by sticking the head onto the scalloped circle so it is offset. -
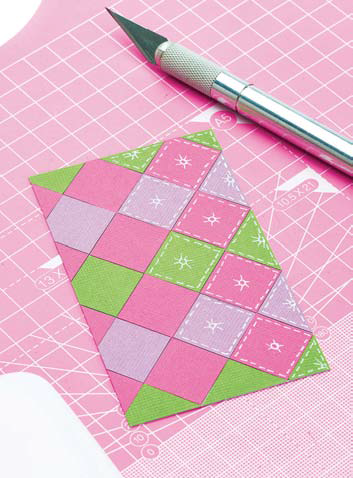
Cover scrap card, 6.5cm x 11cm with 2cm squares of pink, green and purple card in a pattern of your choice. Use the white gel pen to add faux stitching and buttons to each square. -
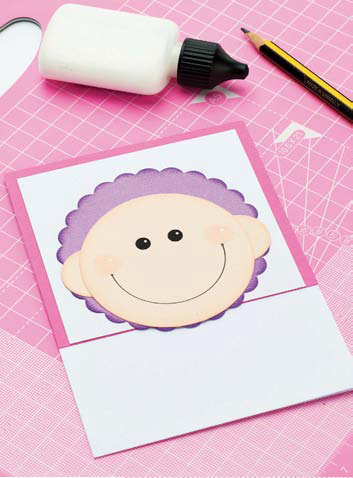
Create a pink and white mount and fix to the top of an A6 blank. Attach the baby to the panel so that it just overlaps the bottom of the mount. Stick the quilt panel to the bottom of the card, add a 1.5cm strip along the top and trim away any excess from the sides. -

For the hands die-cut two 2.5cm circles and two 1.25cm circles. Ink the edges and stick a small circle to the back of the large one, so that about half is showing over the edge. Attach to either side of the baby on top of the white strip. Add a bow to the bonnet and finish with a sentiment.
-

Projects you may also like...


Recommended Projects...
 Crafts Beautiful Edition


