Grab a cuppa and stitch Carolyn Letten's whimsical card set
What you need...
- Fabric, patterned: white, red, pale pink, dark brown, biscuit
Card blank, A5
Thread, sewing: navy, fawn, white
Fusible interfacing
Wadding
Glitter glue
Adhesives
instructions
-
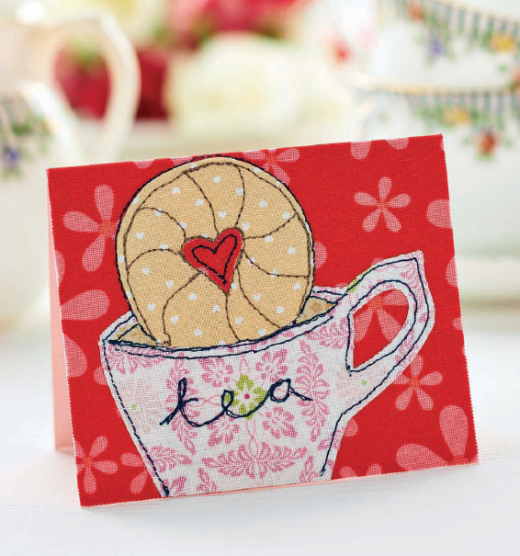
Tea Cup Tag - 1 Fold card, 9cm x 15cm, in half. Use an acid-free glue stick to cover the front with red fabric, allowing for a 1cm overhang onto the back. Using the template for the picture, cut out the top half of the teacup and a circular biscuit, then back both with interfacing.
2 Place both pieces as shown. Cut a small red heart for the biscuit centre and secure with glue. Machine stitch details on the cup in navy thread and the biscuit in fawn. Use two small fawn fabric scraps to add tea to the cup, then machine stitch the word ‘tea’ onto it. -
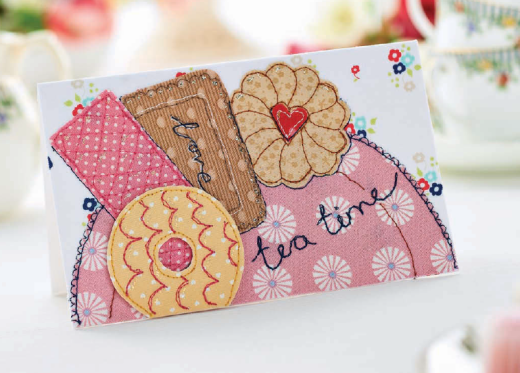
Teatime Card - 1 Trim an A5 card blank, 9cm x 15cm, and cover it with white floral fabric, allowing for a 1cm overhang onto the back. Use the template provided to cut a plate in pink fabric and adhere to the card. Trim three biscuits from the top of the template in the correct colours and attach to the card, allowing to dry.
2 Machine stitch the outline on each biscuit using coordinating threads and fill in the detail. Use white thread to highlight the heart and middle biscuit. Next, machine stitch decoratively around the edge of the plate and the bottom of each biscuit in navy, then stitch ‘love’ to the middle biscuit and ‘tea time’ across the bottom right corner.
3 Cut out the party ring biscuit in lemon fabric and stick it to scrap card, allowing to dry. Machine stitch around it in matching thread and stitch wavy lines across it in bright pink. Trim away all excess card, mount it onto 3-D foam pads and apply to the card at the bottom. Add small dots of glitter glue to the biscuits.


