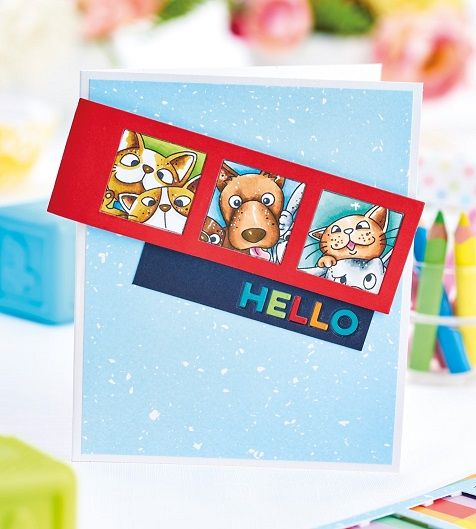
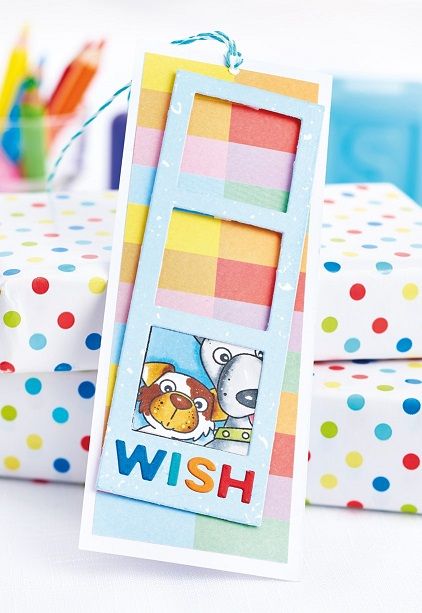
We love Keren Baker's use of these dies to create a selection of scenes - how will you recreate it?
What you need...
- Card: green, orange, jade, navy, red, white
Paper, Dovecraft, Over The Rainbow
Dies: My Favorite Things, Photo Booth Strip, Captions; Tonic Studios, Square
Stamps: My Favorite Things, Picture Perfect; Clearly Besotted, Scrumptious Birthday Sentiments
Ink: Tsukeniko, Memento Tuxedo Black; Tonic Studios, Nuvo Alcohol Acetate
Embellishments
Adhesives
instructions
-
Quick Hello - 1 Using a white card blank, 12.5cm x 15cm, add blue patterned paper on top. Die-cut the photostrip with red and trim acetate slightly smaller than the width, but 1cm
longer than the strip.
2 Stamp the characters onto white and colour. Position the die-cut frame over each image, then choose a portion that looks good and trace around it with a pencil, leaving an extra 5mm around the edge. Trim out the images and adhere behind the apertures. Add the acetate behind the card and leave to dry.
3 Die-cut the ‘Hello’ sentiment out of several colours and black card. Add the black onto the blank at an angle and glue the letters in the gaps. Bend the acetate and card strip slightly, then fold over the ends to create two tabs.
4 Attach one tab onto the edge of the card at an angle and curve the strip so the other tab fits onto the base and runs along the sentiment strip. Add foam pads under the right hand side of the strip so it has an extra anchor point. -
Make a Wish - 1 Take white card, 6cm x 15.5cm, and layer slightly smaller rainbow patterned paper. Add blue patterned paper to white, then die-cut the photostrip out of it.
2 Die-cut some of the letters from ‘Sweet’, ‘Hello’ and ‘Smile’ in different colours to create ‘Wish’ and adhere to the bottom of the tag.
3 Stamp the image onto card and colour in with alcohol markers. Position in place and trace around. Cut out, leaving a 5mm border, then fix on the reverse.
4 Add foam pads behind the photostrip and stick to the base. Punch a hole in the top of the tag and thread twine through. -
Say Cheese! - 1 Take white card, 10.5cm x 15cm, and trim slightly smaller blue patterned paper. Stamp and colour one of the images to use behind the aperture. Take green card and die-cut a square out to make it look like a polaroid-style image.
2 Die-cut the sentiment out of the green. Secure card behind the aperture and add different coloured letters. Adhere the stamped image behind the aperture. Stamp a sentiment below ‘Smile’. Glue to the card blank at an angle, then add a little strip onto the frame for detail.


