Get your kiddie prepped for school with Niki Rowland's stylish stationery!
What you need...
- Punches, Stampin Up!: Circles, Round Tab, Word Window, Decorative Label; Fiskars: Notebook
Paper, Crate Paper: Apple Pie; My Mind’s Eye: Writing on the Wall, assorted; lined
Card: red, green, kraft, cream, indigo
Ink-pads: red, brown
Stamps: thank you; good luck
Bakers twine, red
Stationery: mini paper clips, bulldog clips
Brads, silver
instructions
-
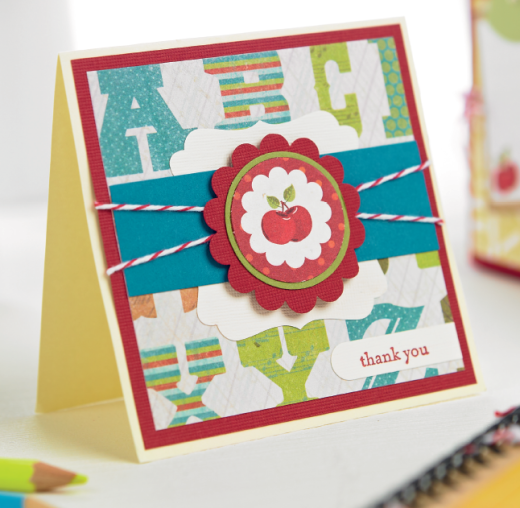
Thank You Card - 1 Mount alphabet paper, 8.5cm square, to red card, 9cm square. Using the decorative label punch, cut a panel from cream and trim in in half lengthways.
2 Stick the two halves either side of an indigo strip, 2.5cm x 8.5cm, tucking them under slightly. Fix the strip to the centre of the blank, as shown. Add red bakers twine around the middle.
3 Cut apples from the apple pie design with a circle punch. Mount onto a slightly bigger green circle and again onto a red scalloped one. Add this to the centre of the card using sticky foam pads.
4 Stamp the sentiment onto cream card and cut out with the word window punch. Stick to the bottom right corner. Fix the design onto a square blank. -
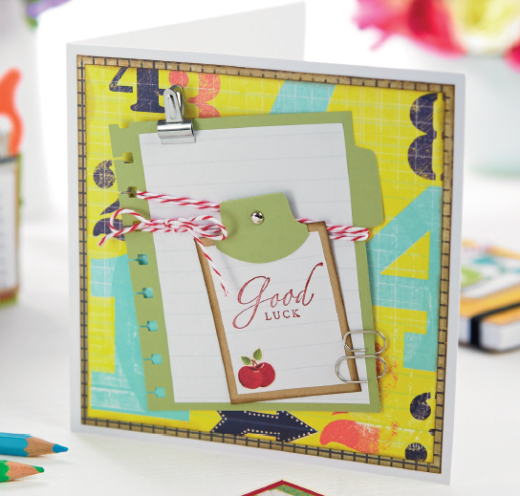
Good Luck Card - 1 Back numbers patterned paper, 13cm square, with grid paper, 14cm square, and stick onto a white blank. Work the notebook punch down the left side of green card, 9.5cm x 11cm.
2 On the other side, draw a tab and cut out. Add lined paper to the centre and a mini bulldog clip to the top. Wrap red bakers twine around the panel, tie in a bow and stick to the card.
3 Cut kraft card, 5cm x 6.5cm, and ink the edges with brown. Glue lined paper to the centre and cut a round tab from green card. Secure on the top to create a mini clipboard. Add a silver brad.
4 Stamp 'good luck' in red ink and glue on apples cut from the apple pie paper. Adhere the mini clipboard on the card, as shown, and add two mini paper clips to finish. -
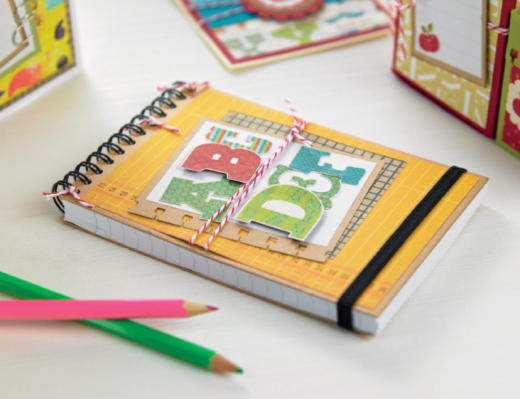
Notebook - 1 Cut grid paper, 7.5cm x 9cm, and stick to the reverse side of apple pie paper, 10cm x 14cm. Work the notebook punch along the left side of Kraft card, 7.5cm x 9cm. Fix lined paper, 6.5cm x 8.5cm, to the centre.
2 Trim letters from patterned paper and arrange onto the lined design. Raise two of the letters up on 3-D foam pads, then wrap bakers
twine around the design and tie in a knot. Fix to an A6 notebook to finish. -
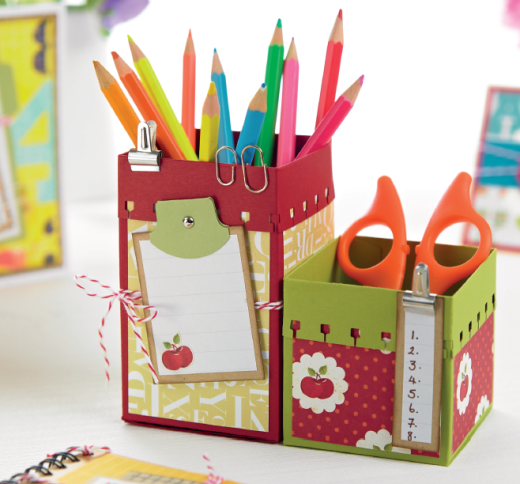
Desk Tidy - 1 Create two boxes using the downloadable pattern; the large one in red and the smaller in green. Use the notebook punch to
create a decorative edge along the top.
2 The smaller box is decorated with four 6cm squares of apple pie paper and the big box uses four rectangles of the alphabet design, 6cm x 10.5cm.
3 Wrap bakers twine around the big box, then secure the two boxes together. Stick a mini clipboard (see the good luck card for instructions), then stick to the front of the red box.
4 Make a tiny ruler by inking kraft card, 2cm x 6.5cm, with brown, then adhering lined paper to the centre. Write in numbers and attach to the box with a mini bulldog clip.


