What you need...
- Fabric: Christmas print; snowflake, green; red; Santa, patterned; sketch; green stripe; spot; plain green; brown; white; orange
Bias binding, red gingham
Interfacing, fusible
Ricrac, silver
Ribbon, Christmas
Rub-on transfers
Embellishments: holly, tree
Glitter paper: white, blue
Adhesives
instructions
-
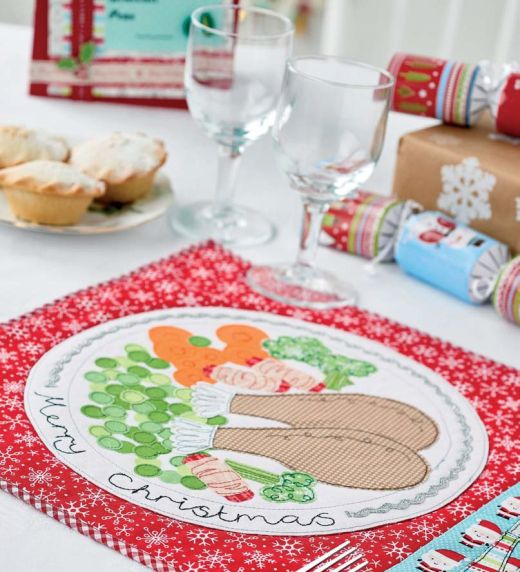
Festive Placemat - 1 Trim red snowflake print fabric, 33cm x 43cm. Set aside backing fabric and wadding of the same size. Create a 25cm white fabric dinner plate and a blue Santa napkin, 7cm x 23cm. Back both with iron-on interfacing and pin in place, as shown on the red placemat. Using a mid-grey thread, machine or hand stitch around the edge of the plate, then again 2.5cm in from the edge. Sew around the edge of the napkin in blue thread. Iron on the reverse.
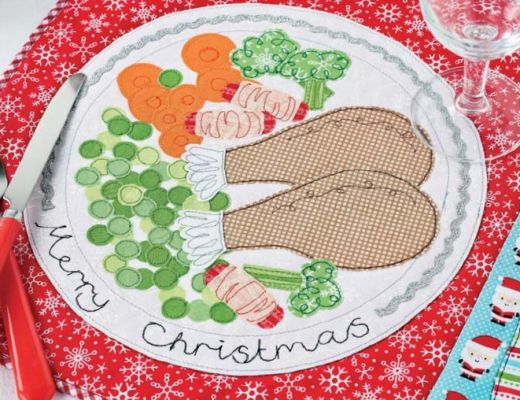
2 Take a random section of the green spot fabric, interface and pin in place. Stitch around the edge, then cut out individual green spots for peas. Position them on top and secure by stitching with green thread. Repeat with orange circles for carrots, also sewing a circle in the middle.
3 Cut out two turkey drumsticks from brown spot fabric and back with interfacing, then pin in place. Secure by stitching around the edge in dark brown thread, adding a decorative line across the top of each one. Fix two white fabric crowns using a dark grey thread.
4 Trim three broccoli stems from green stripe fabric and three tops from green snowflake. Using the picture as a guide, stitch in place with dark green thread. From red stripe fabric, cut out three small sausages and stitch in place. Sew pale pink fabric across the middle of each one using the same thread and iron on the reverse.
5 Trace a ‘Merry Christmas’ sentiment from the template onto white tissue paper and pin it in place at the bottom of the plate. Using black thread, machine or hand stitch over it twice, then tear away the paper. Iron the plate on the reverse.
6 Take a length of silver ricrac and stitch it around the remaining rim of the plate. Cut out two cutlery handles in striped fabric and a knife and fork top in pale grey sketch print fabric. Back all with interfacing. Place as shown on the napkin and stitch to secure using black thread. Iron on the reverse.
7 Lay the backing piece the wrong side up, the wadding on top, then the finished front right side up. Pin and stitch all the way around, 5mm in from the edge. Machine or hand quilt around the edge of the plate and edge of the napkin. To finish, fold red gingham bias binding in half and stitch it all the way round to cover the raw edges, allow enough to fold in and overlap at the end. CB -
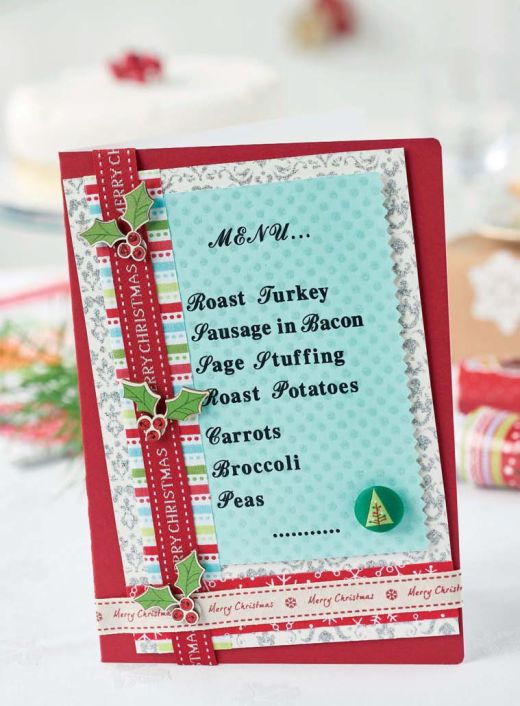
Menu Card - 1 Very lightly pencil mark a line on the left side of glitter blue paper, 11cm x 15cm, and 2.5cm in from the edge. Using this line as a guide for the margin, use rub-on transfers to write the menu. Take a strip of striped fabric and, leaving
an equal overhang at the top and bottom of the menu, stick it to the left so that the right-hand edge of the fabric slightly overlaps the pencil line.
2 Place this onto silver glittered white paper, 13cm x 19.5cm, with a border at the sides and top. Fold the ends of the fabric onto the back of silver glitter paper and secure with glue. Stick a strip of red snowflake print fabric, 2.5cm
x 15cm, across the bottom of the silver glitter paper, securing the ends over onto the reverse.
3 Using 3-D foam pads on the back of silver glitter paper, mount it onto the red card at an angle, as demonstrated. Trim with ribbon. Tuck glue dots under the right-hand edge of the blue paper to lift it slightly off the white. Stick three holly embellishments down one side, adding red glitter glue to the berries, finishing with a fir tree.


