Celebrate a sewist's birthday in style
What you need...
- Card: coloured, textured
Paper: Craftwork Cards, 8x8 Sew Lovely; metallic black
Dies: circles, scalloped circles, tag
Stamps: Papermania, Urban Stamps Stitched Alphabet
Punches: circles, daisy, heart
ProMarkers
Mountboard: dark red, white
Embellishments
Wood dye, dark oak
Paper piercer
Large-eyed needle
Adhesives
instructions
-
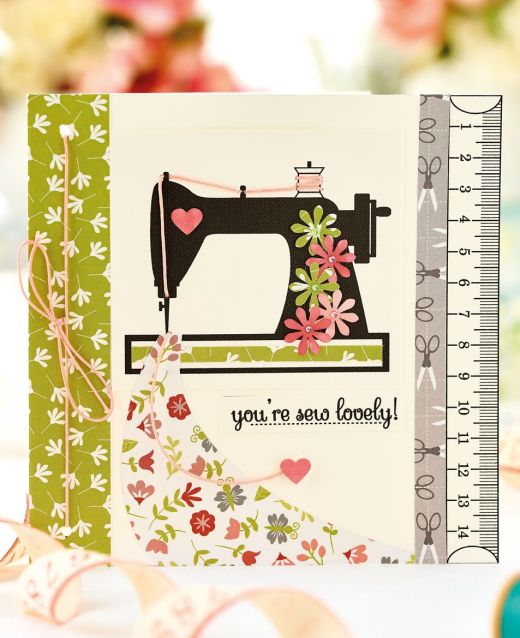
Sew Lovely - 1 Cover the left-hand side of a textured white blank, 14.5cm square, with a 2.5cm panel of green paper. Print the small ruler on textured white card, then cut out and glue to the right-hand side. Add a 1cm wide strip of grey scissor paper.
2 Print the small sewing machine panel and sentiment onto textured white card. Pierce holes in and around the machine to wrap the bobbin and thread it with cord, leaving a long tail. Attach to the front of the card. Matt a 4mm strip of green paper to the sewing machine base.
3 Punch daisies from green patterned and white paper, then colour and stick to the machine. Print the fabric shape onto floral patterned paper, then cut out and add to the front. Secure the sentiment and embellish the daisies with gems.
4 Make two small holes in the green panel, 1cm from the edges and side. Thread cord from the back and tie in a bow at the front. Punch two small hearts from white paper
and colour. Add one to the sewing machine, and use the other on a foam pad to secure and tidy the end of the cord. -
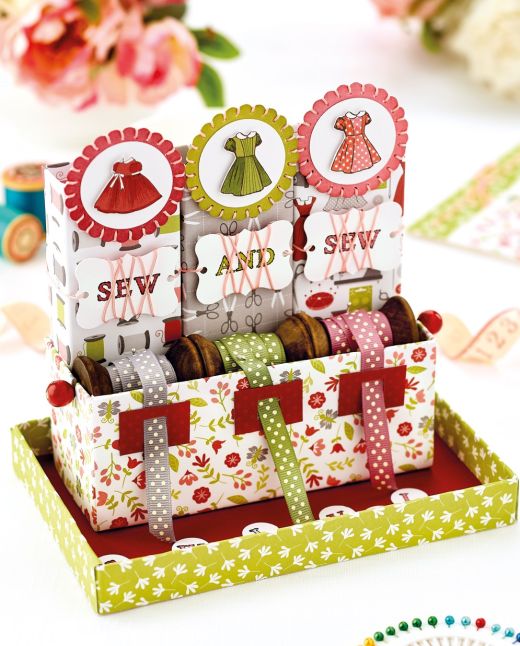
Sewing Desk Tidy - 1 Take the templates for the reel holder, boxes and tray. Cut from mountboard and score along the dashed lines. Make up all the sections using tape or glue, and cover with patterned papers.
2 Stamp ‘sew lovely’ onto white card, then colour and punch out as individual circles. Fix to the tray base. Trim three outfits from the dress paper and stick each to a 3.8cm white circle. Make three 5cm scalloped circles and colour. Evenly pierce holes 3mm from the edge all around and thread with cord from back to front.
3 Matt the dress toppers as shown, then attach one to the top of each box. Punch three tags from white card and a make a small hole in each side. Stamp ‘and’ once and ‘sew’ twice, then colour. Criss-cross the central area with cord, then use the ends to tie tags to the boxes, 4.5cm from top. Insert into the reel holder.
4 Tint three wooden spools with dark oak wood dye, then load with ribbons. Trim a bamboo skewer to 15.5cm. Place the spools on the skewer and rest in the side slots. Embellish each end with a wooden bead. Cut three ribbon keeper slots from red paper using the template. Attach to the front of the reel holder, ensuring the ribbon can be inserted from the top. Place in the tray. -
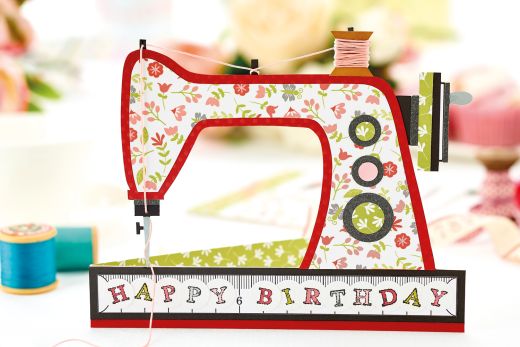
Happy Birthday Card - 1 Download and print the templates. Cut out the large sewing machine from black card and the main body from red. Trim a smaller version of the main body from patterned paper. Matt the layers together. Print the large ruler onto white card, cut out and add to the bottom. Stamp ‘happy birthday’ onto white card, then colour and punch as individual circles. Overlap on the ruler.
2 Embellish the handle with paper strips, and the body with layered circles. Colour the needle and handle crank in silver. Cut out the cotton reel template from brown card and attach to the far right peg.
3 Fix the cord at the back and wrap the reel, leaving a long end. Pierce the far left peg and the section above the needle, and thread the cord around the central peg, then from back to front, draping around the needle.
4 Score mountboard, 3.5cm x 38cm, at 19cm. Fold and cover the inside in green patterned paper. Attach the sewing machine and greeting to the front.


