Try Niki Rowland's easy-to-do iris-folding festive cards that look intricate and ornate
What you need...
- Card: cream, white, red, beige, brown, purple
Paper, assorted patterns
Stamps: sentiments, snowflake
Punches: Modern Label, Word Window, Oval, Scallop Trim Border, hole
Ribbon: purple, cream, green
Cord, silver
Gems
Ink-pads: red, brown, green, beige, purple
Adhesives
instructions
-
Iris-folding - 1 Take an aperture card and position the hole over a pattern. The actual window should be no bigger than the pattern. The card facing up will be the back of your design. Hold in place with tape. Cut your chosen patterned or plain papers into strips, 2cm x 6cm. Fold each in half lengthways so they measure 1cm x 6cm. Assign your different patterned papers to each of the letters on the pattern.
2. Starting from the outside, take an A strip and line up the folded edge of the strip to the first line in the A section. Tape the ends of the strip to the frame. Then take a B strip and line up with the first line in the B section. Repeat with C, D and E strips. Repeat cycle until the pattern has been completely filled. Finally trim any overhanging strips from your frame and turn over to see an incredible result. -
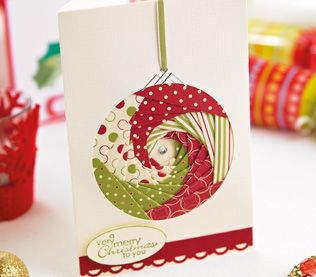
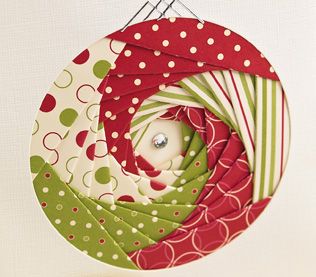
Bauble Card - 1 Cut cream card, 29.7cm x 15cm. Score into three panels of 10cm, 10cm and 9.7cm. Fold into three. Cut a circle, 8cm in diameter, in the middle of the central panel. Follow the pentagon iris-folding pattern using a variety of green, red and cream patterned papers. Once complete, stick a peel-off to the top of the circle and add green ribbon.
2 Fold the short panel so it covers the back of the iris-folding and creates a card. Stick down. Add a sticky gem to the middle of your design. Cut a strip of red card, 10cm x 2cm, and create a decorative edge using the Scallop Trim Border punch.
3 Stick the strip to the bottom of the card. Stamp a sentiment in green ink and cut out with an oval punch. Ink the edge of the oval in green ink to make it stand out, then adhere to the front with 3-D foam pads. -
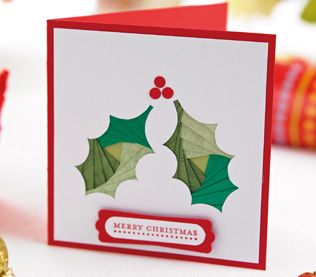
Holly Card - 1 Cut white card, 9.5cm square. Trim out two holly leaves using the template provided. Follow the triangle iris-folding pattern provided for each leaf in a variety of green patterned or plain papers. Stick a small panel of green card or paper to the back of the completed designs in order to cover the middle.
2 Create a red card blank, 10cm square. Stick the completed holly leaves to the front. Add red dots cut with a hole punch to form the berries. Stamp a sentiment in red ink and cut out with the Word Window punch. Mount onto red card cut with Modern Label punch. Add to the base using sticky foam pads.
Punches and stamps available from Stampin' Up!, http://www.stampinup.co.uk


