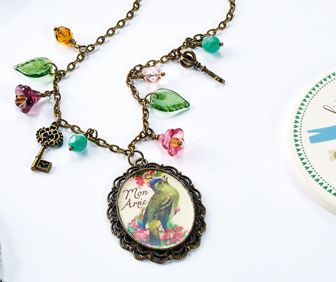
Create Helen Cant’s antique-style botanical set using vintage imagery and resin
What you need...
- BEADS Flower, Czech glass, 10mm x 13mm: raspberry crush x 3; amethyst x 3, Leaf, glass, 18mm x 13mm, green x 4, Round, faceted, glass, 8mm: opaque turquoise x 6; rosaline x 6; topaz x 5, Round, glass, 4mm, yellow x 6, Charms, antique brass, keys: 26mm x 9mm x 2; 27mm x 12mm x 4
FINDINGS Bezels, antique brass-plated: 20mm, circle, rope-edged x 5; 40mm x 30mm, oval x 1 Brooch back bezel, antique brass-plated, 30mm, circle, Bezel ring blanks, antique brass, 20mm, circle, Jump rings, antique brass: 5mm x 28; 6mm x 8; 8mm x 5, Chain: curb, antique brass, medium link, large link; trace, antique brass, small link, Head pins, antique brass, Ear wires, antique brass, Clasp, antique brass: toggle; lobster
TOOLS Resin, doming and glazing, Gedeo, Printer, Paper, photo, A4, matt coated, inkjet, 170G, Measuring cups, graded in millilitres, Lolly sticks, Heat gun, Paint brush, Glue, PVA, Pliers: round-nosed; flat-nosed, Cutters, wire
instructions
-
Necklace - 1. Download the PDF file for this project, Load a sheet of matt coated photo paper into your printer. For optimum printing, ensure your printer is set to its highest quality level in the preferences menu before printing. Afterwards, leave the paper for at least an hour to allow the ink to fully dry.
2. Cut out one of the large oval printed images, coat the reverse with PVA glue then position into a large antique brass oval bezel. Press down well to ensure it is completely adhered then leave to fully dry. Apply six coats of PVA glue to seal the paper, allowing it to dry between each and ensuring it is applied right to the very edges to prevent the resin seeping underneath and spoiling its appearance. Once the last coat of PVA glue is fully dry and feels completely free of any moisture, prepare 12ml of resin according to the manufacturer’s instructions. Only a small amount is required in each bezel, so this will be enough to make all the pieces in the set.
3. Pour a small amount of resin into the centre of the bezel and spread it out to the edges using a lolly stick, adding more as necessary to fully coat the image. Remove any air bubbles by gently heating the resin for a few seconds at a time with a heat gun. Leave to dry away from sources of fluff and dust for at least 24 hours or until fully cured.
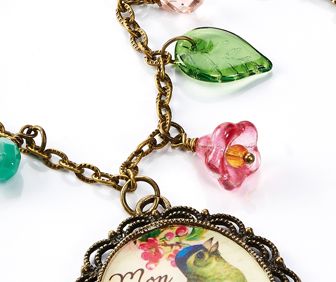
4. Thread a 4mm yellow round glass bead followed by a pink glass flower onto a head pin then form a wrapped loop. Repeat with a 4mm yellow round bead and a purple glass flower. Create four singly beaded head pins using a selection of 8mm turquoise, pink and topaz faceted glass rounds.
5. Cut a piece of small link antique brass trace chain to the desired finished length for the necklace. Attach the bezel to the centre with a 6mm jump ring. Secure an equal number of the beaded head pins, along with a glass leaf bead and an antique brass key charm, to the chain at both sides of the bezel.
6. Form an extension chain, cut 4cm of medium link antique brass curb chain, create another single bead drop then attach to the end of it. To finish, secure the extension chain and a lobster clasp to the ends of the necklace chain with jump rings.
-
Make it yours - For a great range of alternative imagery to create your own vintage-style designs, visit http://www.thegraphicsfairy.com.


