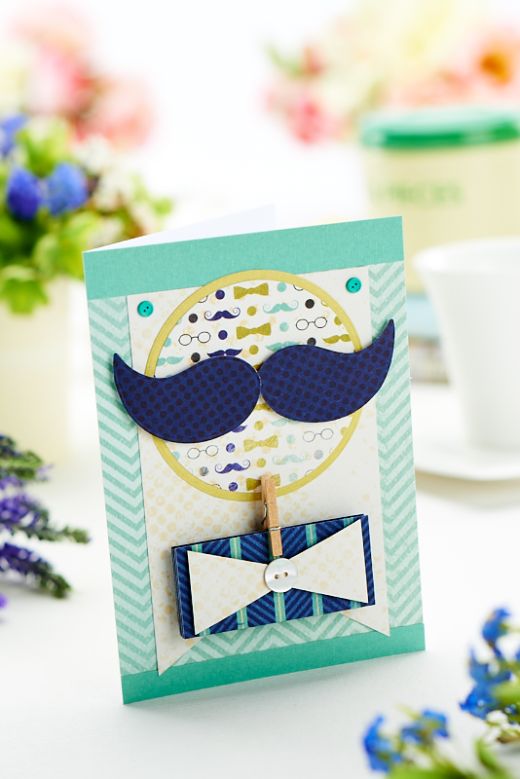
Create a novelty card that your dad will love using our easy die-cut design
What you need...
- Paper kit, themed/patterned
Card: green, white
Dies: Nesting dies, Xcut, Paisley; circle
Cuttlebug machine
Chalkboard cartridge, Cricut
Paper piercer
Thread, green
Button brads, blue
Button, mother of pearl
Ink-pads: green, lime
Wooden peg
instructions
-
Take an A6 blank and cover the front with green zig zag patterned paper. Add a 3cm high strip of jade card to the top and a 2cm high strip across the bottom. Trim out a large ribbon shape from cream patterned paper and stick beneath the horizontal strip at the top of the card.
-
Die-cut a large green circle and a slightly smaller one from patterned paper. Join together with double-sided tape. Cut out two small paisley shapes from dark blue paper. Turn the paper upside down to create mirror images of finished shapes. As this die is a little wide for the desired moustache shape, run it through the cutting machine twice, moving the die further up the first shape. Fix the designs to the centre of the layered section using foam pads.
-
Trim a panel of dark blue striped card, 6.5cm x 17cm. Score horizontal lines at 3cm intervals and fold concertina-style. Type and print words onto paper. Trim to fit on the panels of the folded section. Stick in place, then cut out a bow tie shape from cream paper. Sew a small button to the bow tie using thread.
-
Fix the round topper to the card, allowing the top of the circle to overlap the border. Trim the fold-out section to the bottom with foam pads, positioned in the corners only. Pierce a small hole in the top corners of the cream section and add two button brads. Finish with a small wooden peg attached to the front.


