
Blog
Blog

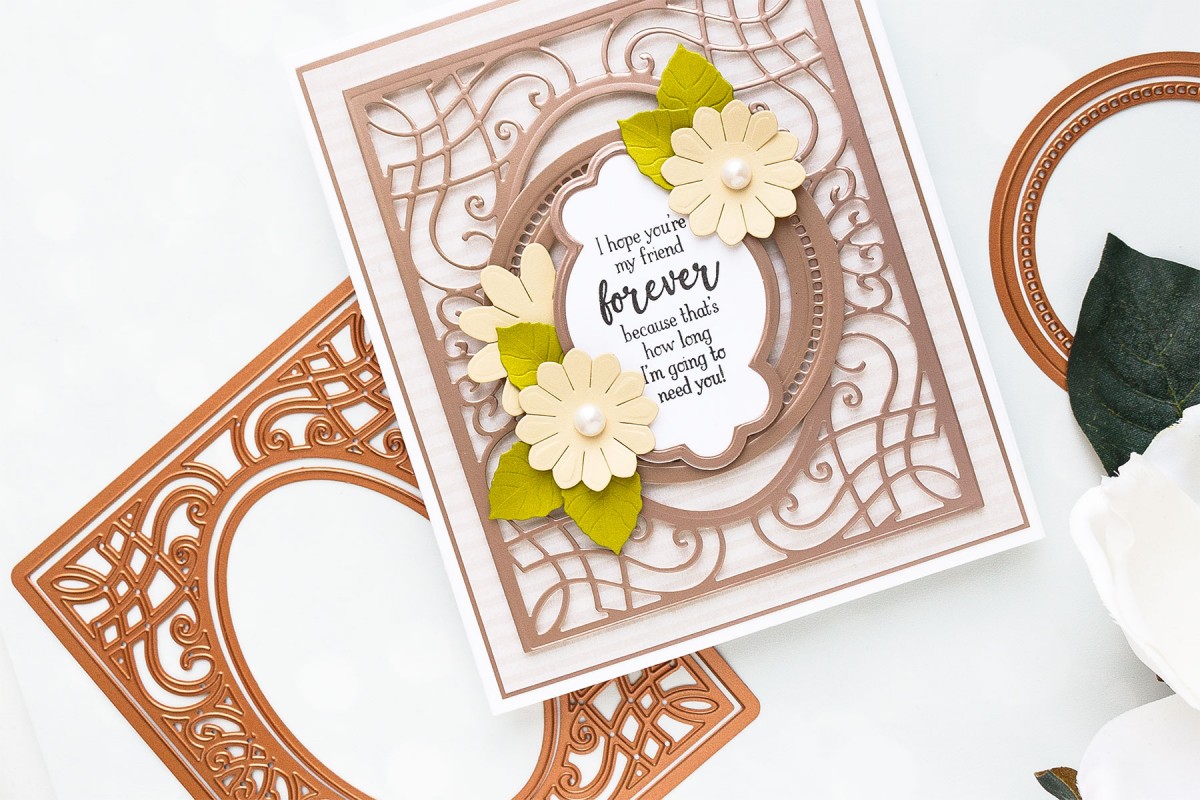
Hello, Crafts Beautiful readers! My name is Yana Smakula, I am an in-house creative designer for Spellbinders and I’m thrilled to bring you this fun, quick and easy tutorial showing how to create an elegant card for a friend with the help of beautiful dies from the Romancing The Swirl collection by Becca Feeken for Spellbinders.
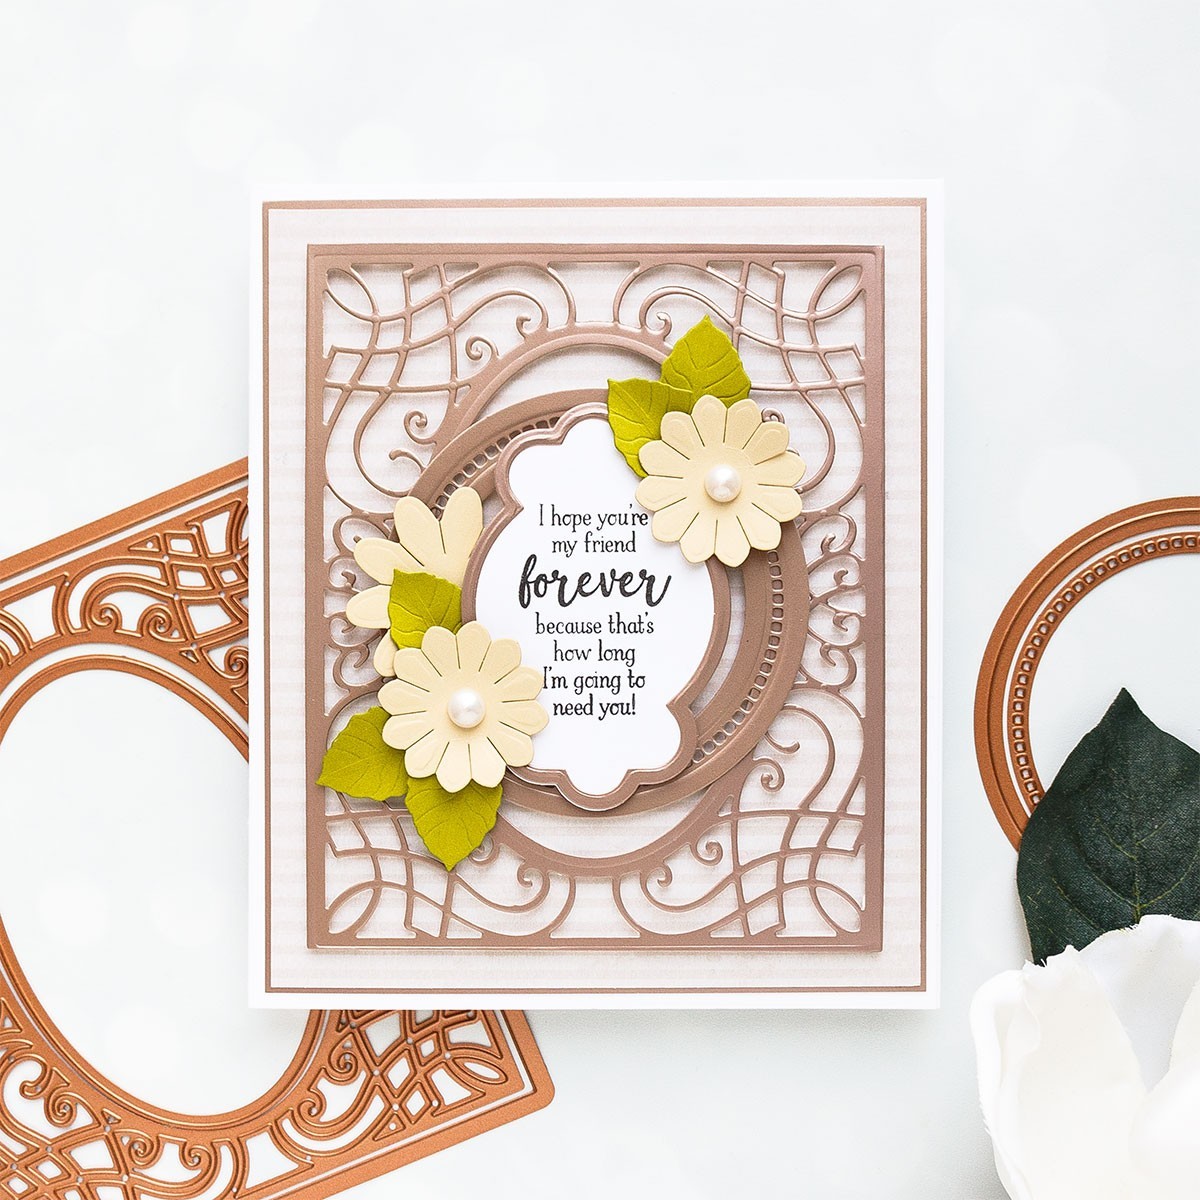
I decided to go with a friendship card, however by using a different kind of message you can easily turn this project into a birthday, anniversary or any other kind of greeting you might need! Let’s get started!
Here’s what you’ll need:
● S4-926 Swirl Tags
● S4-928 Hemstitch Circles
● S5-364 A2 Corner Cotillion
● PL-001 Platinum Die Cutting and Embossing Machine - 8.5” Platform
● T-001 Tool ‘n One
Whenever I work with dies, I love to sketch out my card design using the dies themselves. I take the dies I want to use, play around and try to position them on my desk in a way that I’d like to see them being positioned on my card. This is a great way to visualise your future card design without putting in too much effort and cutting anything out. This helps me to tell if the dies I picked (especially if I choose to use dies from multiple sets) will work nicely together and co-ordinate in terms of size and style.
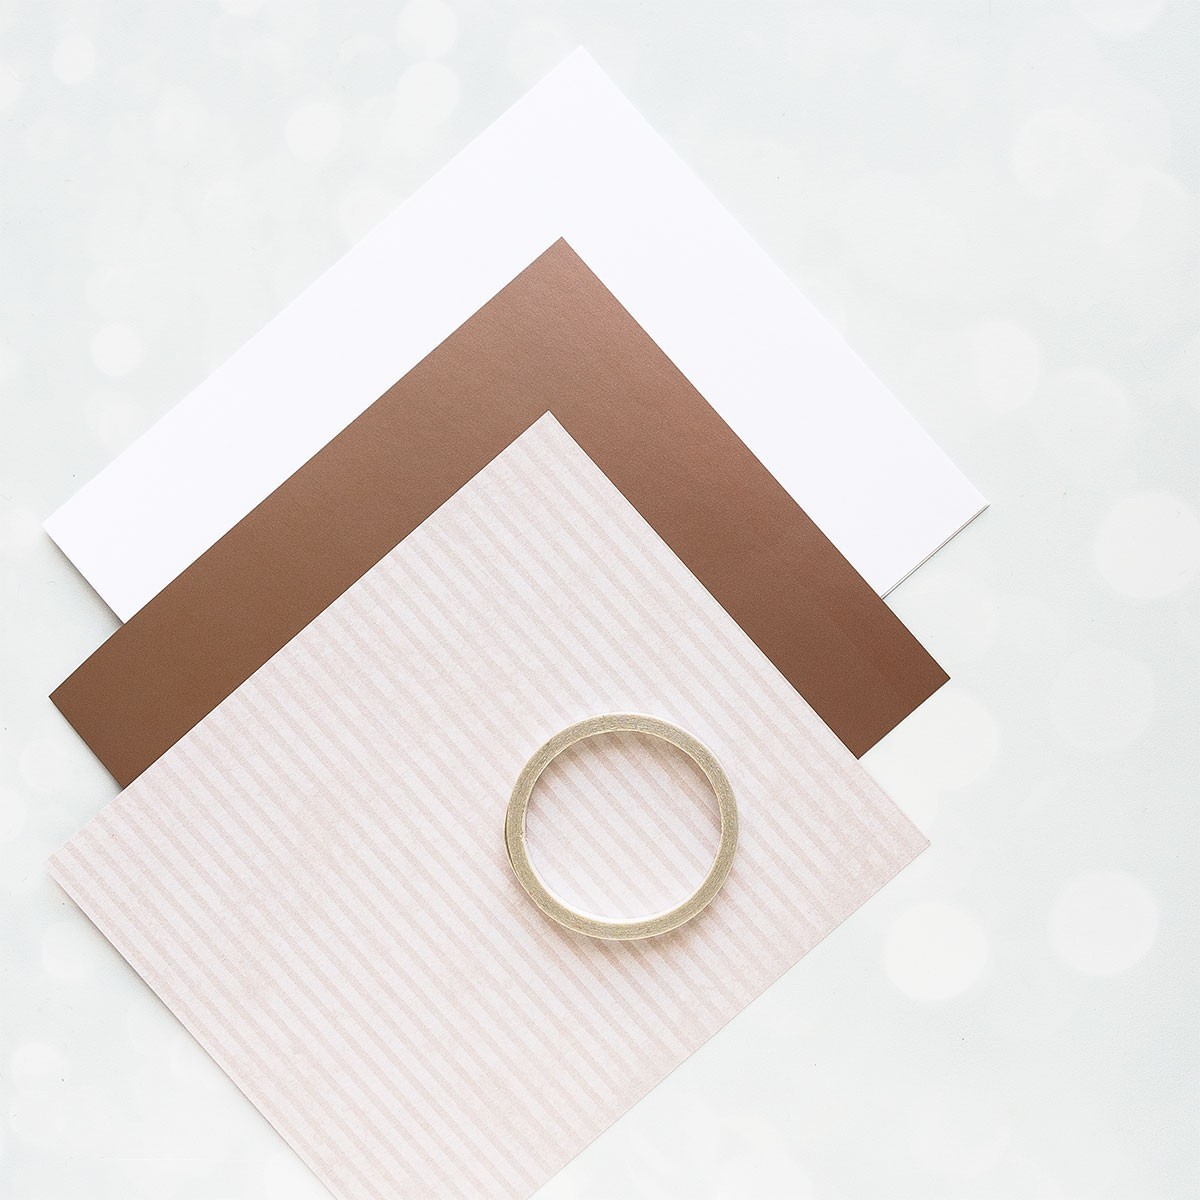
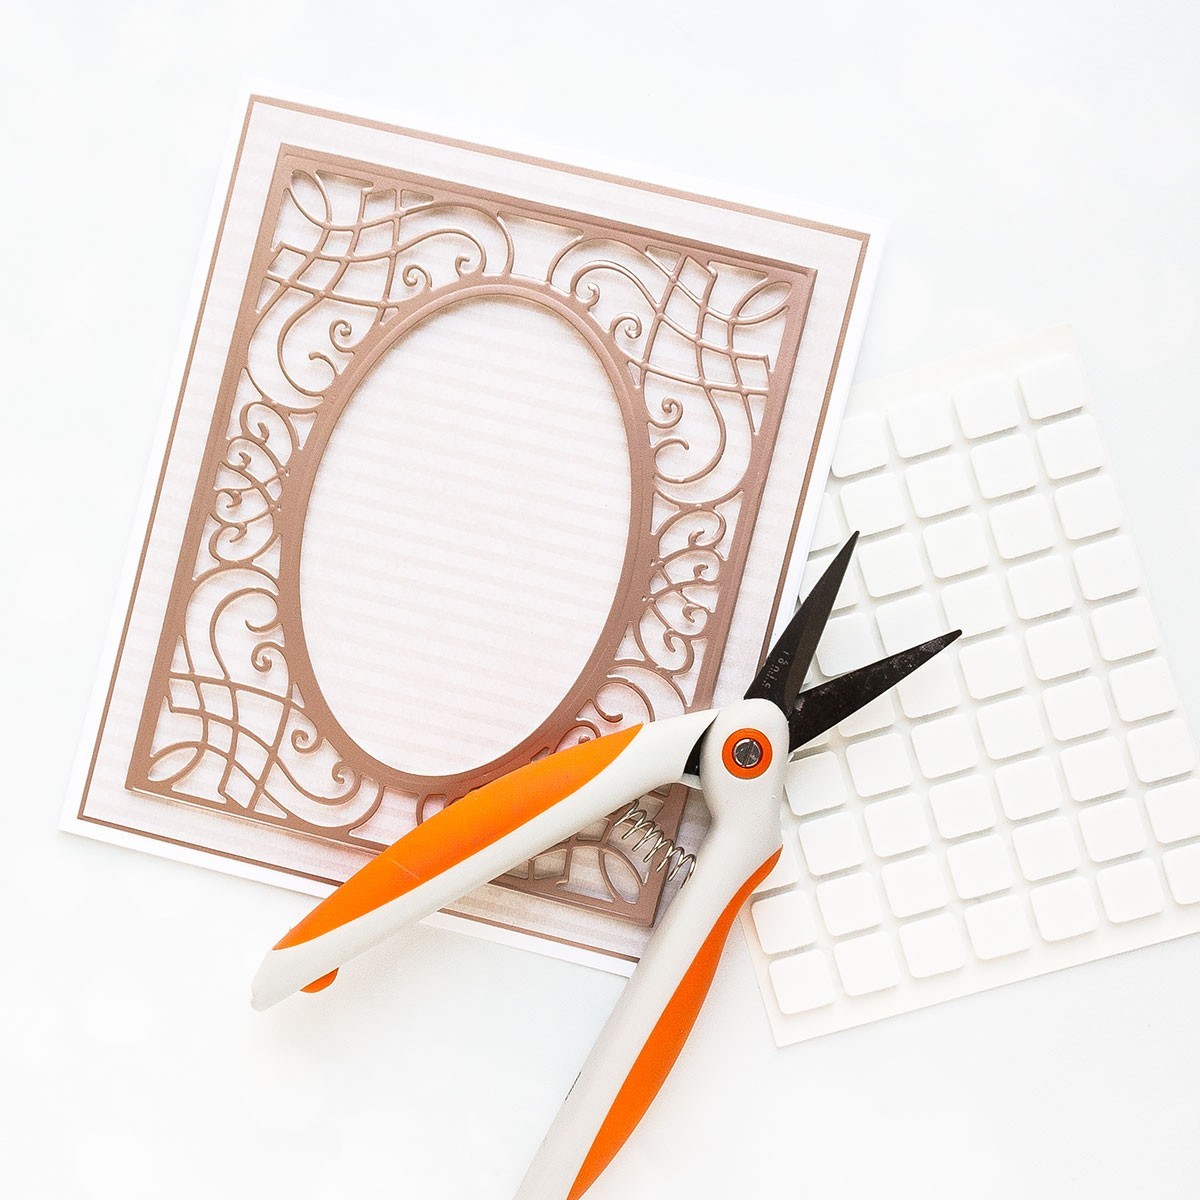
I like to pick the colour scheme and pretty papers for my project. For this project, I decided to go with soft, neutral colours. Taking the size of the main die into account, create a white side-fold blank, 14cm x 16.5cm. Cut a patterned paper panel, 13.3cm x 15.9cm, and a matt layer, 13cm x 15.5cm, then stick together and adhere onto the card.
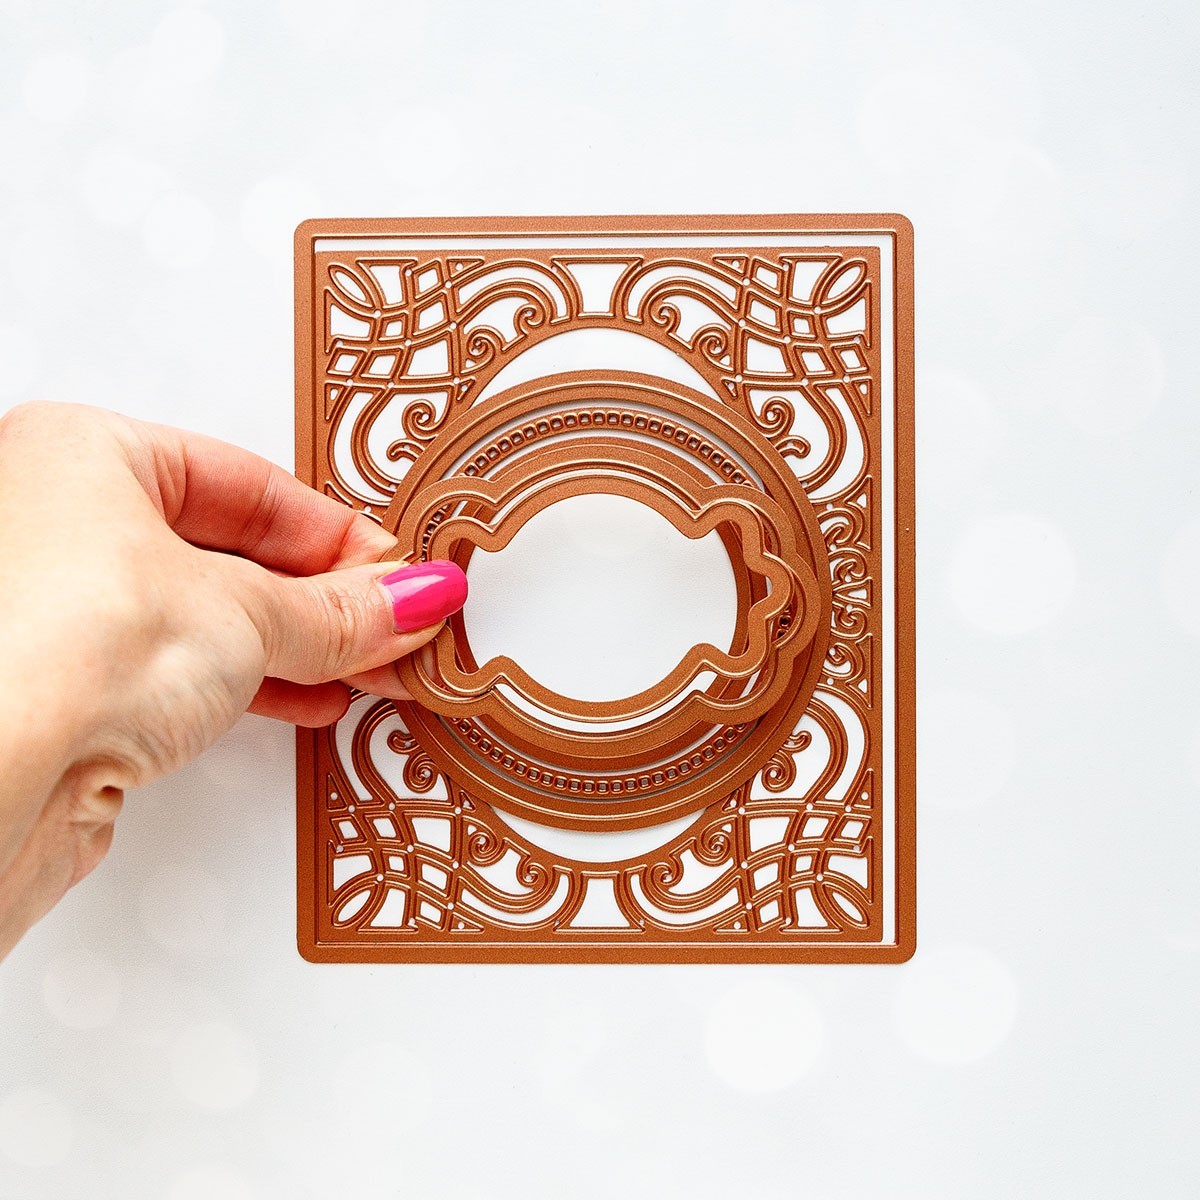
Die-cut and emboss a panel using the A2 Corner Cotillion die: outer border, decorative insert and inner oval die. Make sure to use a bit of low tack tape to secure all three together when running them through your die cutting machine to avoid shifting. This is a very delicate and detailed die, so use the Spellbinders Tool ‘n One to clean the die and die-cut from any negative pieces.

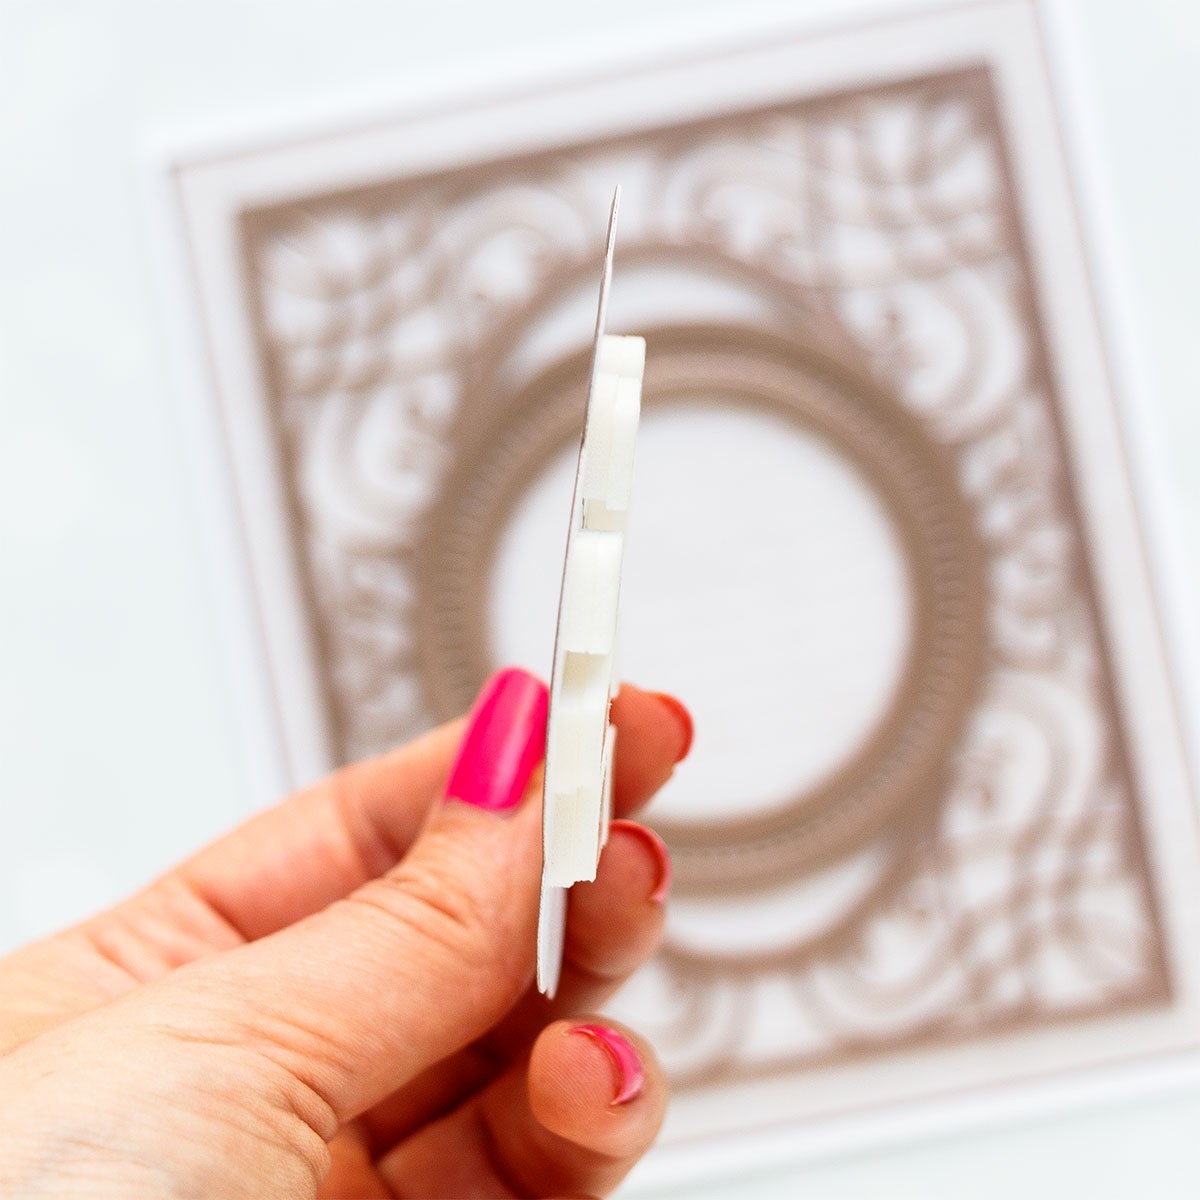
I love to add dimension to my projects, so I always try to use foam adhesive to pop my die-cut layers up. Cut foam adhesive squares into skinny strips and mount the die-cut onto the card. Using foam adhesive helps separate the die cuts from the background and makes them appear prominently on your finished project.
Next, die-cut and emboss a circle frame using several dies from the Hemstitch Circles set. Use a medium hemstitch insert and two outer border dies to create a frame. When embossing, remove the two outer border dies and only emboss using the hemstitch insert. At the same time, die-cut a label from white card using one of the dies from the Swirl Tags set. Stamp a sentiment in black ink, then die-cut a frame out of muted rose gold paper using two dies from the same set. Adhere the frame onto the label.
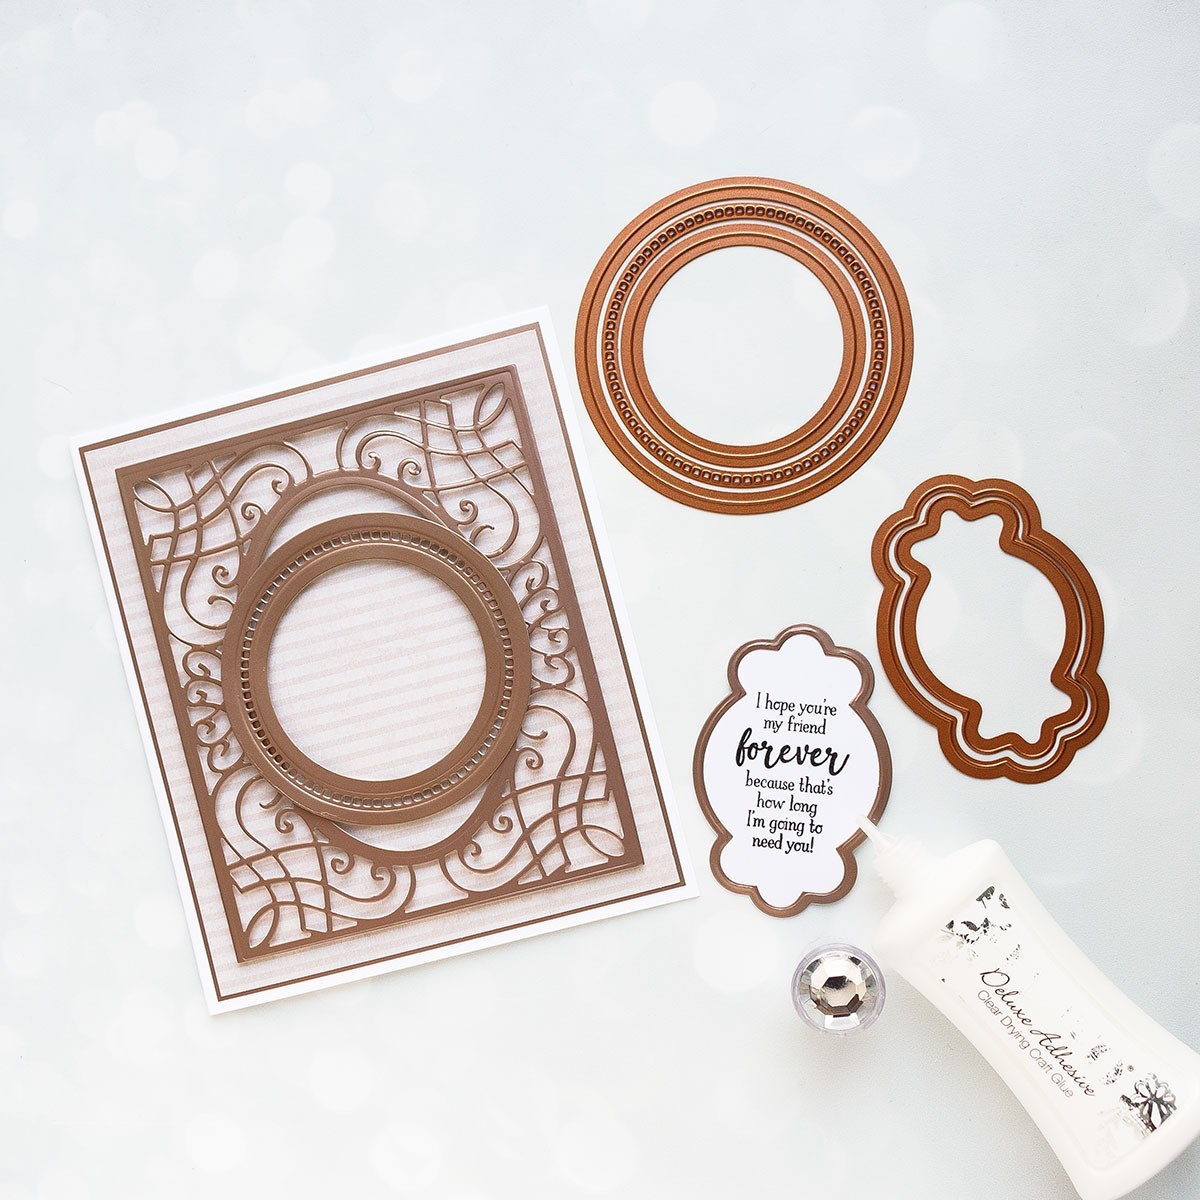
To pop the sentiment panel up even more, add a double layer of foam adhesive and foam mounted label. If you prefer to make less dimensional cards, skip using so much foam adhesive or use thin foam adhesive instead of regular (it will be twice thinner).
To dress the card up, die-cut several flowers and leaves using dies from the A2 Corner Cotillion set out. After shaping each one cut with your fingers, adhere it in place, framing the sentiment. To finish, embellish flower centres using liquid pearls.
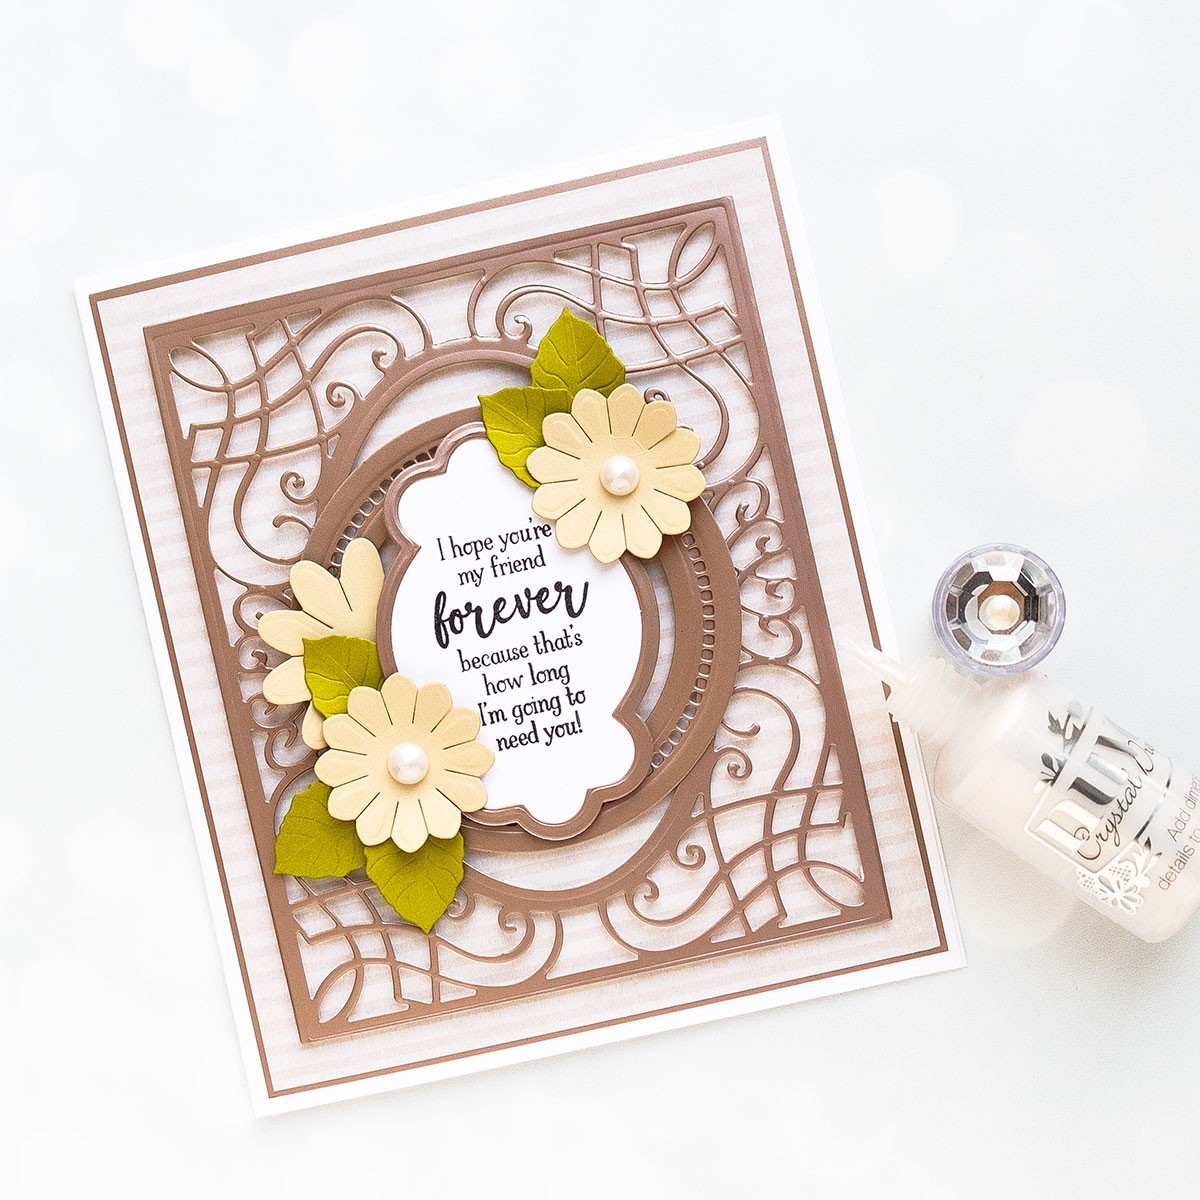
There are many ways that the dies from this collection can be used to create gorgeous, one-of-a-kind cards. All of them are designed to work together and make your job, as a cardmaker, easier when creating beautiful paper masterpieces!


Blogs you may also like...


- SHARE
-

-

-
 hello
hello
-

Recommended Projects...


 Crafts Beautiful Edition