Recreate a jaunty holiday theme with our sunny set of seashore greetings
What you need...
- Card: navy, royal blue, light blue, red, white
Paper, wood print
Thread, cotton, red, white; embroidery
Sewing machine (optional)
Garden twine
Ribbon bow, red
Button
Lettering, transfer, black
Paint, blue
Sponge, dry
Foam pads
Glue
Tape, double-sided
Scissors/craft knife
Cutting mat
Hole punch
instructions
-
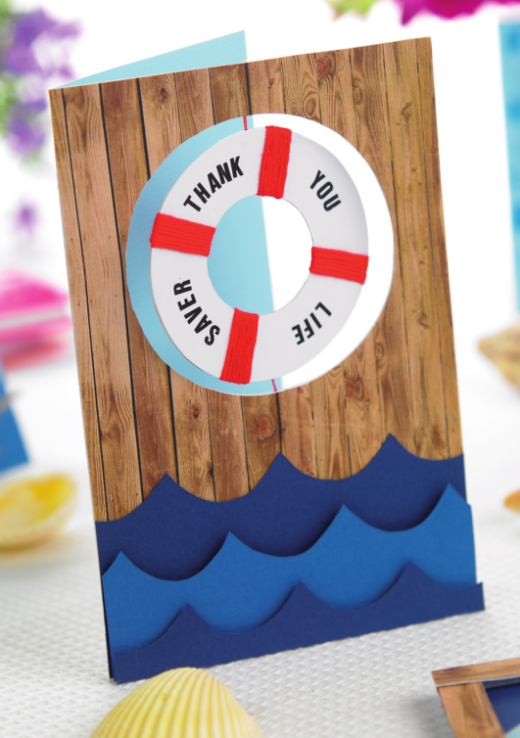
Thank You - 1 Cover the front of a base card, 10cm x 15cm, with wood print paper, then cut away a circle towards the top. Add a blue panel to the inside, behind the hole.
2 To make your spinner, stick two white circles together, trapping the red cotton in between. Cut away the inner piece and wrap four lengths of red embroidery thread around the ring, tucking the ends underneath. Add 'Thank You Life Saver' in the spaces between the thread with transfer lettering.
3 Use tape to stick the spinner to the inside of the card behind the hole. Be sure to pull the cotton taut when attaching, so that the shape spins and stays within the cut out area. Cover the inside left area with white paper, trimmed to size to hide the tape.
4 Create waves from navy and royal blue papers, sticking the larger shape down first with double-sided tape. Overlap the two in front on sticky foam pads to add some depth. -
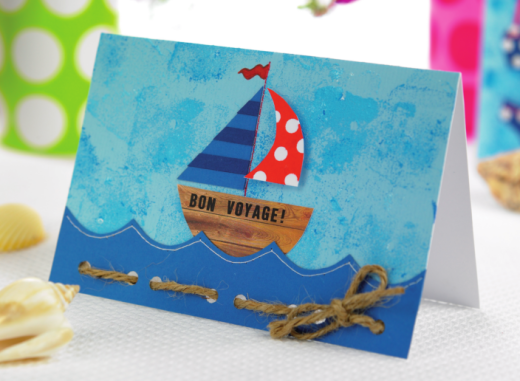
Bon Voyage - 1 Use a dry sponge to add painted texture to light blue paper and cover the front of a tent-fold card, 10cm x 15cm. Cut out a wood print boat then transfer the words 'Bon Voyage' along the top. Create a sail from royal blue paper and layer navy stripes across it.
2 For the polka dot sail, cut out the red shape from card and hole punch randomly, before layering onto a white base card. Stick the boat and
striped sail in place. Stitch a red line up the side of the sail. Draw a flag at the top of the stitch line. Add the sail on foam pads to create some depth.
3 Snip waves out of blue paper, adding a contrast stitch line along the top edge. Stick to the bottom of the card, overlapping the boat, then punch holes along the edge. Thread string through with a knot in the back to keep it in place, and tie a bow with another piece. -
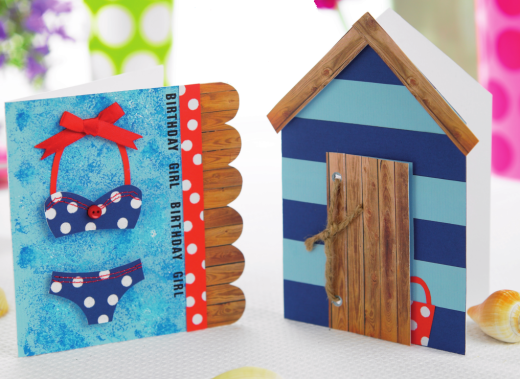
Birthday Girl - 1 Use a dry sponge to add painted texture to light blue paper, then cover the front of a 12cm square blank. Stick wood print paper to the right side of the card, and cut away a large scalloped edge.
2 To create the polka dot stripe, stick down a strip of white paper and overlay with a punched red strip of the same size. Use transfer lettering for 'Birthday Girl' and repeat down the side of the borders.
3 Refer to the pattern pages for the bikini shape. Cut a white layer, then overlay with punched navy paper to create a spotty pattern. Add detail with contrast stitching along the top edges of each shape.
4 Attach the bikini to the card using sticky foam pads, then add detail with a red paper strap at the top, a red button and satin ribbon bow. -
New Home - 1 Using the template on the pattern pages as a guide, trim white base card, 10cm x 15cm, and cover the front with light blue paper. Add navy
stripes horizontally at 2cm intervals. Cut the roof shape from the wood print paper and stick in place using the foam pads.
2 Create the door from light blue and wood print paper. Glue the blue layer in place. Score and fold along the side of the wood door, then stick down the fold only, allowing the door to open.
3 Punch two holes in the left of the door and thread string through from the inside, tying in a knot at the front. Place a transfer greeting saying 'Hut Sweet Home!' behind the door.
4 Cut the bucket and spade out of red paper. Use a punch to make holes in the bucket shape, then stick on a layer of white to create the spots. Attach them just behind the door.


