Our Christmas Special 2014 came with a FREE felt and decoupage kit - and here are the felt decs you can make with it! Enjoy...
What you need...
- Felt, various colours
Thread: white, black
Ricrac and trims
Paper, scrap
Glue, PVA
Pegs
Pinking shears
instructions
-
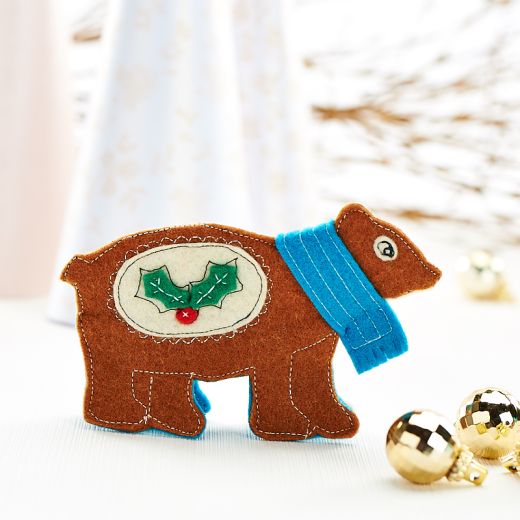
Bear - 1 Using the template, cut one bear from brown felt, one from cream and a rectangle, 6cm x 10cm, for the gusset from blue felt. Trim one brown oval, one cream oval, four holly leaves in green and two red berries. Using two strands of white thread, stitch the holly leaves and berries to each oval. Machine or hand stitch an outline to the leaves in back/white thread. Pin each oval onto the bears - the cream oval onto the brown bear, and the brown oval onto the cream bear. Machine stitch just inside the edge, then in black/white thread sew a scallop pattern around the edge of each. Stitch an eye in the same way.
2 Fold the blue gusset in half lengthways and mark both ends of the fold with a pin. Now place the brown bear right side up onto the blue gusset so the feet line up. Using white thread, stitch around the bear close to the edge starting at the first pin, then stop at the second pin. Sew the white lines that separate both leg pairs. With the gusset folded in half, pin the cream bear to the brown bear (they will be wrong sides together) along the top, make sure the feet align with the blue feet. Push down so the gusset becomes flat and stitch around the cream bear’s legs as you did before, stopping at each pin. Now stitch around the rest of the bear.
3 To make your finished bear stand properly, you may need to hand stitch at both ends of the blue fold, pulling the stitches tightly. For the scarf, use the template to cut one from blue felt. Leaving 1cm at each end, machine stitch four straight lines in white thread. Snip into the 1cm ends to make a fringe, fold the scarf in half and place it around the neck. Secure with a few hand stitches. -
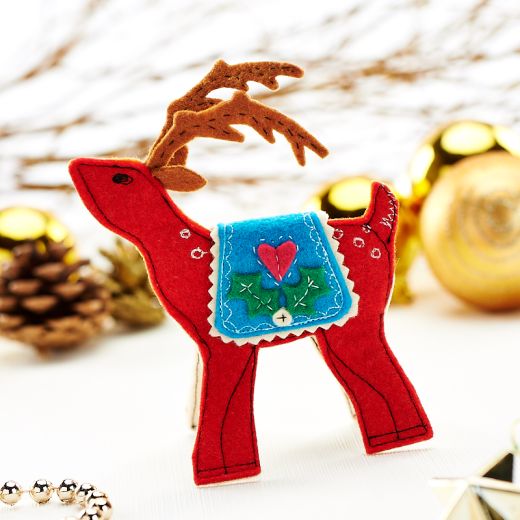
Reindeer - 1 Cut one deer from orange and another from red felt. Cut a pair of antlers and ears from brown felt and set aside. On both the red and orange deers, stitch a few white circles to the neck and top-right of the back, and zig zag detail to the tail. Stitch an eye in black thread.
2 Cut cream felt, 9cm x 14cm, and lay one of the deer pieces onto it so that its feet are level with one short side. Use black thread to stitch from point A to point B on the bottom half, just in from the edge. Stitch the two lines to separate the legs in black thread. Fold the cream felt in half so the fold goes across from A to B, and hold in place with a pin.
3 Place the second deer half onto the cream so that the feet match at the bottom and pin. Now remove the previous pin and push down so the deer does the ‘splits’ and machine round in black from A to B as before. Put the deer into standing position and match up the bodies, then pin and stitch round from A to B in black on the top half. Trap the ears and antlers at the top of the head.
4 For the blanket, cut one from blue felt and one slightly larger in cream felt, cut with pinking shears. Cut out four holly leaves, two hearts and two white berries. Arrange as shown at both ends of the blue and hand stitch the details. Place this onto the cream felt and stitch a decorative border. Use PVA to secure it onto the deer, holding with pegs until dry. -
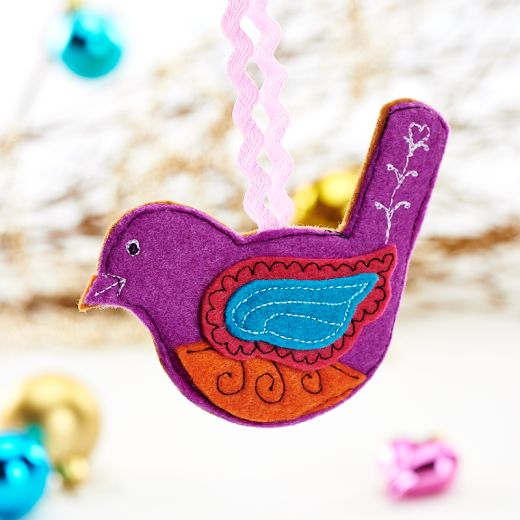
Bird - 1 Cut one full bird from brown felt and another from purple felt. Cut one breast in red and one in orange, then two large wings, one in blue and one in pink. Cut two smaller wings, one in purple and one in blue. Take the four wing pieces and place them separately onto scrap paper. Use black thread to machine stitch a scallop pattern around the edges of the two larger wings. Use white thread to stitch detail lines onto the smaller wings. Tear the paper away and set aside.
2 Place the breast pieces onto the bird piece and machine stitch detail swirls using black thread. Using white thread, stitch a decorative pattern to the tail and sew the eyes. Take the finished wings and place them onto each bird side, hand stitching them around the curve only so that they remain three-dimensional. Place the finished birds wrong sides together and use black thread to stitch around them close to the edge, catching the raw ends of ricrac braid, 15cm long, at the top to form a loop to hang. -
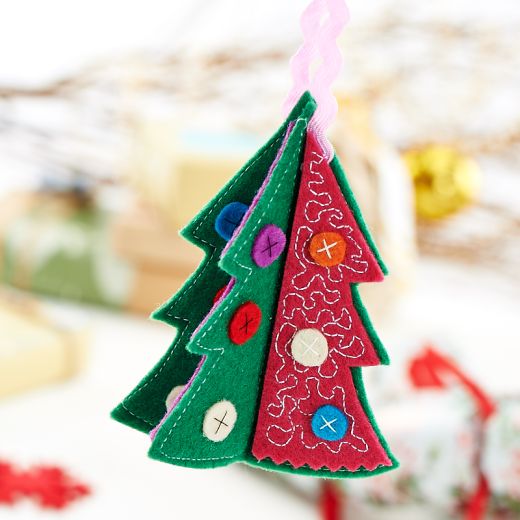
3-D Tree - 1 Cut out two trees in green felt. Cut out four ‘half’ trees in different colours and 24 small circles in assorted colours. In one of the green trees, make a slit from top to bottom but leave 1.5cm uncut at the bottom edge and top point of the tree. In the second tree, cut into each end, 1.5cm, leaving the middle uncut. Using white thread, machine stitch around all the edges of the trees and down both sides of the middle.
2 Using black thread, stitch three assorted colour circles onto the left-hand side of each tree then turn them over and repeat on the left side only. Place the half trees onto scrap paper and machine random wavy lines all over them in white, then tear the paper away. Use the same thread to cross stitch three circles onto each piece and trim across the bottom with pinking shears. Apply small dots of PVA to the back of each and position on the right-hand side of the green tree pieces (you will need to turn them over to stick onto all four right hand sides). Trap ricrac, 15cm, in the top of the finished tree as you glue. -
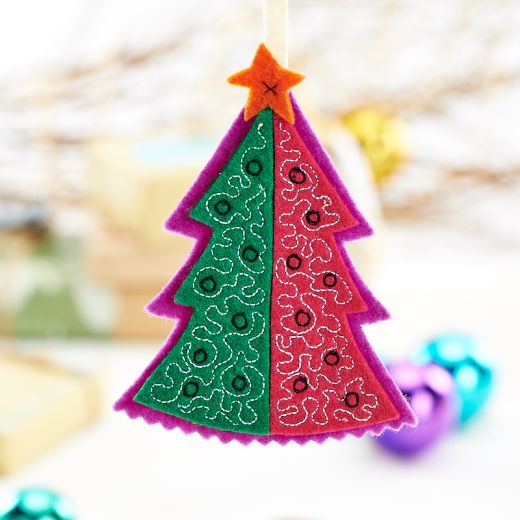
2-D Tree - 1 Cut a tree from purple felt and trim across the bottom with pinking shears. Cut out two half trees in pink and green, then place them on scrap paper. Stitch black circles as shown and fill the rest with random wavy lines.
2 Tear the paper away and use PVA to stick them onto the purple tree so the join is in the middle. Cut a loop from cream felt and hand stitch to the top of the tree. Finally, cut out an orange star and stitch it over the loop ends, securing with a cross stitch.


