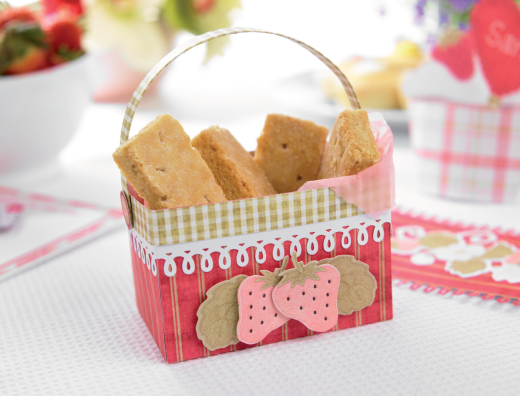
Present homemade biccies in this summery strawberry basket
What you need...
- Die-cut toppers, Nitwits Strawberry Social
- Paper: ticking red, gingham green
- Punch, Martha Stewart Edger, loops (M284105W)
- Card, white
- Tissue paper, pink
- Brads, small, red
- Adhesives
- Glossy Accents
- Trimmer
- Pricking tool
instructions
-
Cut two pieces of red ticking paper, one 10cm x 19cm, and the other, 6cm x 23cm. Score and fold each, 6.5cm in from either end, with white sides facing. Unfold, then place one strip across the other, white sides uppermost, sticking the two central rectangles together. The folded up sides will form a loose basket shape.
-
Punch two strips along A4 white card using the loops edger. Trim to 3cm wide. Stick the end of one strip to the other, matching the loops. Cut two 1.5cm wide strips of green gingham paper, overlapping them to form one long strip.
-
Starting in the centre of one of the basket sides, stick the looped strip along the top, then continue around the remaining three sides and trim any excess. Repeat with the green gingham strip, overlapping the white as shown.
-
Cut white card, 1cm x 21cm, and attach centrally to green gingham paper, 3cm x 21cm. Fold the excess over to cover the white and stick down. Curve the strip to form a handle. Hold one end in the centre of one basket side, level with the gingham edge. Pierce through and secure using a brad with the legs on the outside. Repeat on the opposite edge.
-
Add Glossy Accents to the back of a button from the die-cut sheet and stick to the top of the opened brad. Repeat on the opposite end. Add two die-cut leaves to the basket front using 3-D foam, then attach two strawberries. Fill the basket with pink tissue to finish.
Projects you may also like...
Recommended Projects...
 BusymittsShare your makes


