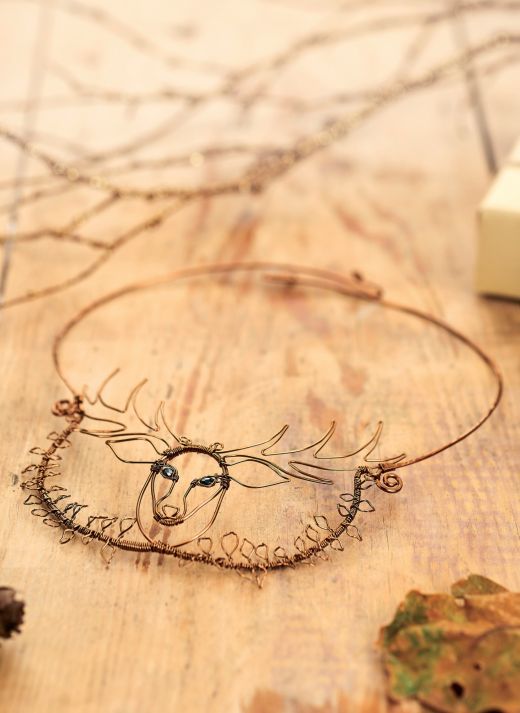
Create a beautiful wirework necklace with Gemma Crow
What you need...
- Hematite faceted rice beads, 2mm x 3mm x 2
- Antique bronze wire, 0.4mm, 0.6mm, 0.8mm, 1mm, 1.5mm
- Basic Jewellery Making Kit (see p76)
- Mandrel, 3cm diameter
- Hammer
- Steel block
instructions
-
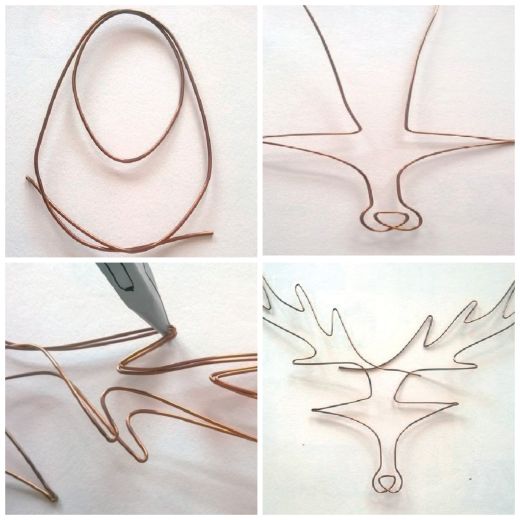
Stag Collar - 1. Cut 50cm of 1mm wire and wrap it twice around a mandrel that's 3cm in diameter. While firmly holding the two tails so as not to increase the size of the circle, pull the shape so that a smaller inner circle appears. Gently shape the circles into ovals, by pulling them and carefully squeezing the sides. Add more shape to the smaller oval to create the outline of the stag's face (Fig.1).
2. Cut 1m of 0.8mm wire and grasp it at the centre point with snipe-nosed pliers. Pull the wires in opposite directions over the plier jaws, allowing them to cross and create a nose and upper lip shape. Bend the wires so that they sit parallel to form the snout of the stag. Lay this section on top of the face to determine the size, then mark where the ear shapes should be formed. Create a sharp bend in the wire to form the tip of each ear; to achieve a point, pinch the bent wires together with flat -nosed pliers (Fig.2). Form the ears into teardrop shapes.
3. To create the antlers, bring the wires from either side of the ears together and form the shape around the pliers with both strands at the same time. This can be done either freehand or using a template if you prefer. Forming both antlers at once will ensure that they are perfectly symmetrical (Fig.3). Once the basic antler shape is completed, open the two sides out (Fig.4).
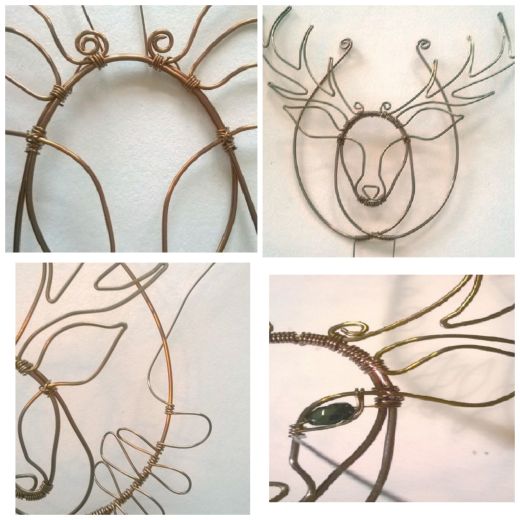
4. Use flat-nosed pliers to squeeze the antler tips together to create nice sharp points, gently manipulating the shape until you are happy with the look of the antlers. Trim the excess wire and create a tiny spiral at the end of each that sits on the stag's forehead. Bind the inner face and antlers to the outer frame at all areas where the wires cross one another using three to four wraps with 0.4mm wire (Fig.5).
5. Trim the excess frame wire and create a small spiral at each end. This will form the leafy garland and frame for the stag so it should be cut to line the ends up with the antlers (Fig.6). Cut 2m of 0.6mm wire and working from the centre, bind the two wires at the base of the outer frame together where they cross. Use the excess to wrap around the frame, leaving small loops on opposing sides all the way along the frame (Fig.7).
6. Take each loop and twist to form a stem, then gently form into a leaf shape. Attach rice beads to form the eyes with 0.6mm wire, using it to surround each one and define the eye shape (Fig.8).
7. Cut two 25cm lengths of 1.5mm wire for the sides of the collar, forming a spiral at one end of each and a hook at the other. Shape them so that they will sit around the neck, then work harden the whole length including the spirals by gently hammering the wire. Bind the antlers to the neck wires using 0.4mm wire. -
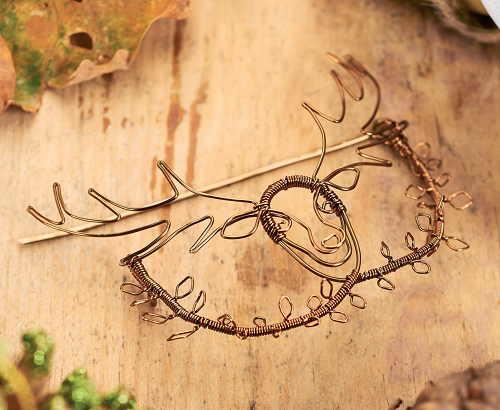
Scarf Pin - 1. To create a scarf pin, repeat steps 1-6 of the stag collar, scaling the design down and using 0.8mm wire for the outer face and frame, 0.6mm wire for the inner face and antlers, and 0.4mm wire for the garland. Create a closed loop at one end of the garland and a hook at the other end.
2. Cut a length of 1mm wire to form the pin, creating a loop at one end and filing the other into a point. Attach the loop in the pin to the loop on the garland. The hook on the other end will hold the pin in place when worn.
Projects you may also like...
Recommended Projects...
 BusymittsShare your makes


